Setting Up a Fresh RHEL 10 Installation on Proxmox VE for RHCSA & Ansible
The RHCSA is a hands-on, performance-based exam. You are given live systems, a list of tasks, and no multiple-choice safety net. The best preparation is a lab where you can break things, fix them, and start over in minutes.
In this guide you will build exactly that: a Red Hat Enterprise Linux 10 (RHEL 10) virtual machine on Proxmox VE, laid out to mirror the exam environment, with spare disks for storage practice and a ready-made connection to an Ansible controller.
What you will have at the end:
- A minimal, UEFI-booted RHEL 10 VM with a static IP and a hostname you chose.
- Three blank 5 GiB disks reserved for partitioning, LVM, swap, and file system exercises.
- An unprivileged user you can use to practice
sudoconfiguration. - SELinux in enforcing mode and
firewalldrunning, as on the exam. - Key-based SSH access and a passing Ansible
ping. - A clean Proxmox snapshot to roll back to after destructive practice.
Prerequisites: a working Proxmox VE host, the RHEL 10 DVD ISO uploaded to Proxmox storage, and a free Red Hat Developer subscription (it is free for individual use at developers.redhat.com).
Note on versions. Proxmox and Anaconda menus change slightly between releases. Option names below match current releases, but if a label differs on your screen, look for the closest equivalent.
1. Design Decisions: What We Build and Why
Before clicking anything, it helps to understand the choices. Each one was made to either mirror the exam or make practice safer and faster.
| Component | Recommendation | Alternative | Why we chose it, and the trade-off |
|---|---|---|---|
| Machine type | q35 |
i440fx |
q35 emulates a modern PCIe chipset, closer to current server hardware. i440fx still works, but offers no benefit for this lab. |
| Firmware | OVMF (UEFI) |
SeaBIOS (legacy BIOS) |
Modern servers boot with UEFI, so you practice the layout you will meet in production: an EFI System Partition at /boot/efi and GRUB managed through UEFI. Trade-off: UEFI needs an extra EFI disk in Proxmox. |
| CPU type | host |
kvm64 / default |
Important for RHEL 10: it requires a CPU supporting the x86-64-v3 instruction set level. Generic emulated CPU models often lack those flags, and the installer will refuse to boot. host passes through your real CPU’s features. Trade-off: VMs are harder to live-migrate between different CPUs, which does not matter in a single-node lab. |
| OS disk size | 20 GiB (thin-provisioned) | 10 GiB | Package caches, kernel updates, and Flatpak exercises consume space quickly. Thin provisioning only uses real storage as data is written, so the extra headroom costs almost nothing. |
| Practice disks | 3 × 5 GiB blank disks | One larger disk | Separate, empty disks let you run destructive commands (fdisk, vgextend, mkswap) without any risk to the OS. Three disks cover the partitioning, LVM, and swap/NFS scenarios in the syllabus. |
| Network | Bridged to LAN (vmbr0) with static IP |
NAT bridge | A bridged VM is reachable directly from your workstation and Ansible controller. NAT would require port forwarding, which adds complexity unrelated to the exam. |
| Software selection | Minimal Install | Server with GUI | The exam systems are lean. A minimal install forces you to install tools yourself with dnf, which is itself an exam skill. |
2. Creating the VM in Proxmox VE
Open the Create VM wizard and work through each tab. For every setting, the reason is given so you can adapt the build to your own hardware.
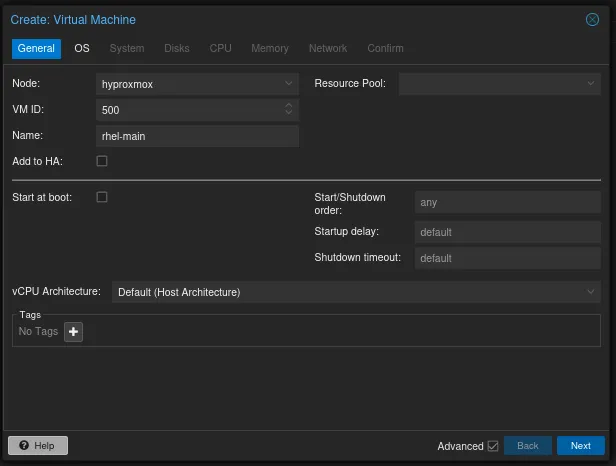
General tab
| Field | Value | Why |
|---|---|---|
| Node | Your host node | The hypervisor that will run the VM. |
| VM ID | A unique number, e.g. 100 |
Proxmox uses it to track configuration files and snapshots. |
| Name | rhel10-rhcsa |
A descriptive label on the dashboard. It is separate from the hostname you set inside the OS. |
OS tab
| Field | Value | Why |
|---|---|---|
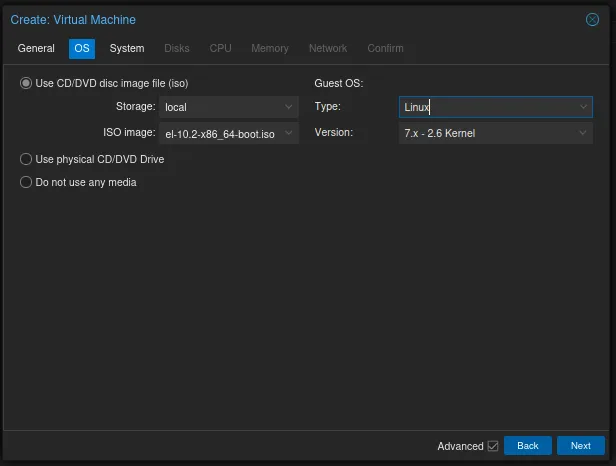
| Storage | The storage holding your ISOs, e.g. local |
Where Proxmox looks for installer media. |
| ISO image | rhel-10.x-x86_64-dvd.iso |
The DVD (Binary) ISO contains the full package set, so you can install from it offline. The smaller “boot” ISO needs the network and a subscription first. |
| Guest OS type | Linux, 6.x - 2.6 Kernel |
Tells Proxmox to apply defaults suited to modern Linux kernels. |
System tab
| Field | Value | Why |
|---|---|---|
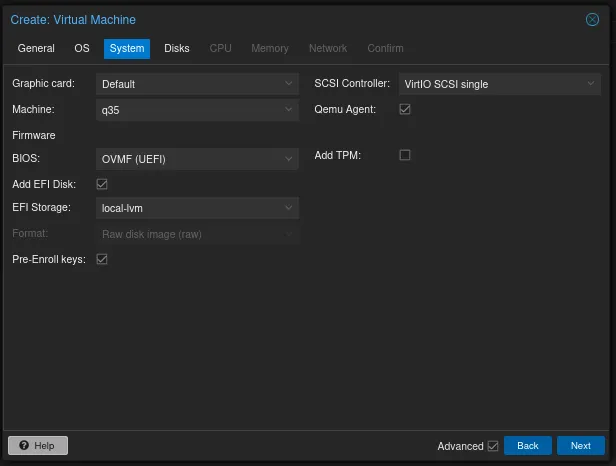
| Machine | q35 |
Modern PCIe chipset emulation (see the design table). |
| BIOS | OVMF (UEFI) |
Enables UEFI boot. Proxmox then requires an EFI disk. |
| EFI Storage | local-lvm or your ZFS pool |
Holds the UEFI variable store (NVRAM), which remembers boot entries between reboots. |
| Pre-Enroll keys | Checked | Loads the default Secure Boot certificates. RHEL’s bootloader is signed, so Secure Boot works out of the box. |
| SCSI Controller | VirtIO SCSI single |
Gives each disk its own I/O queue (iothread-capable), which improves throughput. Disks appear as /dev/sdX inside the guest. |
| QEMU Agent | Checked | Lets Proxmox read the VM’s IP address, trigger clean shutdowns, and freeze the file system for consistent snapshots. The agent must also be installed inside the guest (done later). |
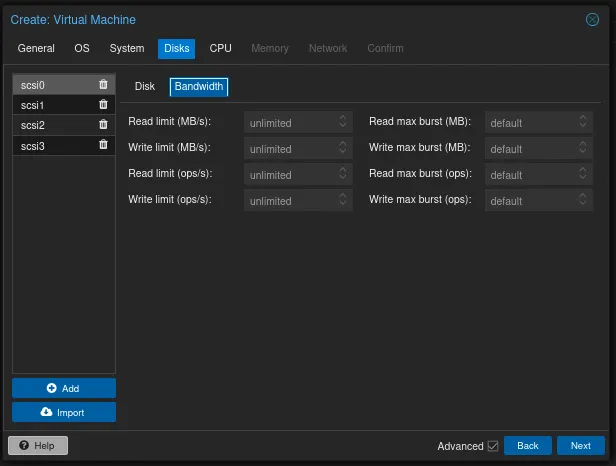
Disks tab
Create the OS disk first, then add three practice disks.
Disk 0: OS disk
- Storage:
local-lvmor ZFS. Thin-provisioned pools are ideal for labs. - Disk size:
20 GiB. - Bus/Device:
SCSI, which uses the VirtIO SCSI controller selected earlier. - SSD emulation: Check this if your host storage is SSD or NVMe. The guest then treats the disk as non-rotational and picks a suitable I/O scheduler.
- Discard: Check this. When the guest frees blocks, TRIM/UNMAP commands pass through so the thin pool can reclaim the space. (Inside the guest,
fstrimor thefstrim.timerunit triggers the cleanup.)
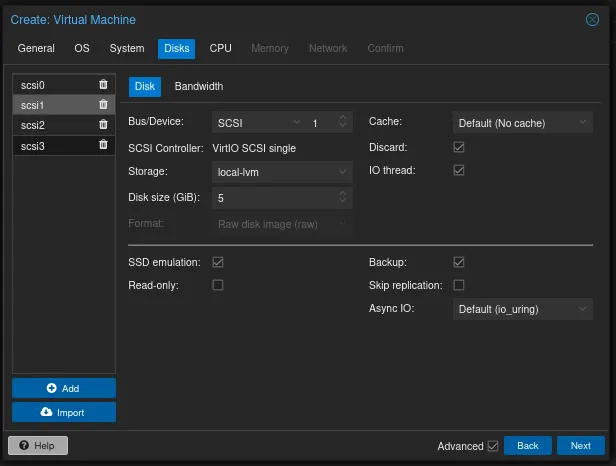
Practice disks: click Add three times
| Disk | Size / Bus | Intended use | Syllabus objectives |
|---|---|---|---|
| Disk 1 | 5 GiB, SCSI | Partitioning and file system creation | Create and delete partitions on GPT disks; create, mount, and unmount VFAT, ext4, and XFS file systems |
| Disk 2 | 5 GiB, SCSI | LVM: physical volumes, volume groups, logical volumes | Create and remove PVs; assign PVs to VGs; create, delete, and extend LVs |
| Disk 3 | 5 GiB, SCSI | Swap, NFS exports, autofs, and non-destructive additions | Add partitions, LVs, and swap non-destructively; mount NFS; configure autofs |
Why 5 GiB? It is large enough for realistic exercises (several partitions, a multi-PV volume group, a swap area) yet small enough that creating and wiping file systems takes seconds. Apply the same Discard/SSD settings to these disks if you like.
CPU tab
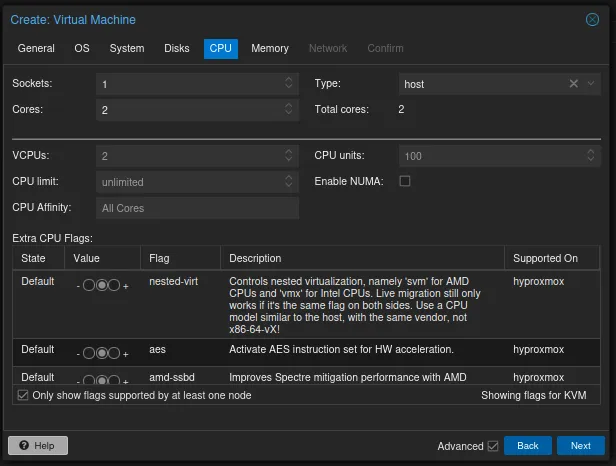
- Sockets / Cores:
1socket,2cores. Enough fordnfoperations and services, and it also lets you observe CPU load meaningfully when you practice identifying CPU-intensive processes. - Type:
host. This is required in practice for RHEL 10 because of its x86-64-v3 baseline.
Memory tab
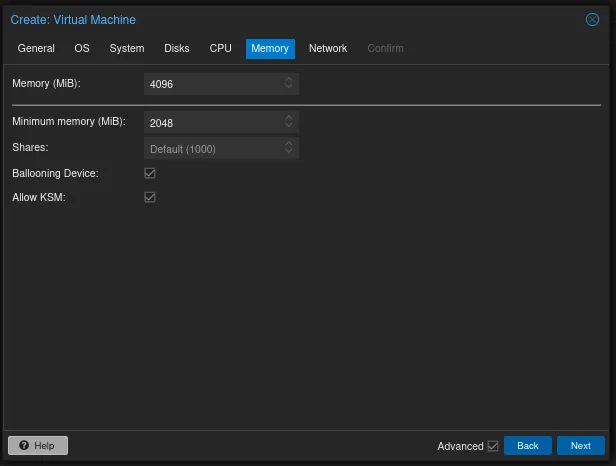
- Memory:
2048MiB is the minimum;4096MiB makes package operations and the installer noticeably smoother. - Ballooning Device: Uncheck. Ballooning lets the hypervisor reclaim guest RAM dynamically, which makes memory-related practice (checking
free, observing swap usage) unpredictable. Fixed RAM keeps your observations consistent.
Network tab
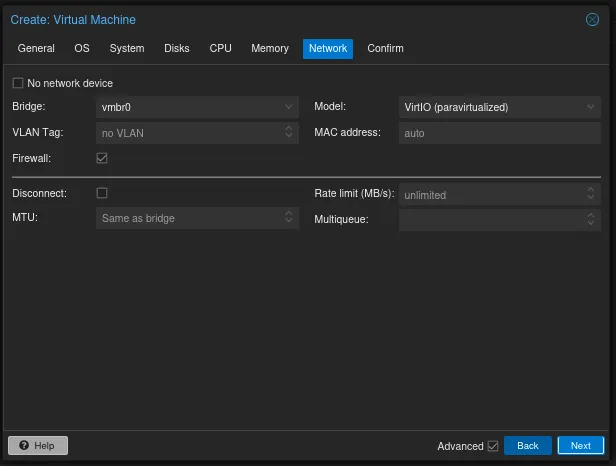
- Bridge:
vmbr0, connecting the VM to your LAN. - Model:
VirtIO (paravirtualized). It is the fastest option and RHEL includes the driver, so no extra setup is needed.
Finish the wizard but do not start the VM yet. Review the summary below.
Proxmox settings at a glance
| Tab | Setting | Value |
|---|---|---|
| General | VM ID / Name | 100 / rhel10-rhcsa |
| OS | ISO image | rhel-10.x-x86_64-dvd.iso, Linux 6.x kernel |
| System | Machine / BIOS | q35 / OVMF (UEFI) with EFI disk |
| System | SCSI controller / QEMU agent | VirtIO SCSI single / enabled |
| Disks | OS disk | 20 GiB SCSI, SSD emulation and Discard as appropriate |
| Disks | Practice disks | 3 × 5 GiB SCSI |
| CPU | Sockets / Cores / Type | 1 / 2 / host |
| Memory | RAM / Ballooning | 2048–4096 MiB / off |
| Network | Bridge / Model | vmbr0 / VirtIO |
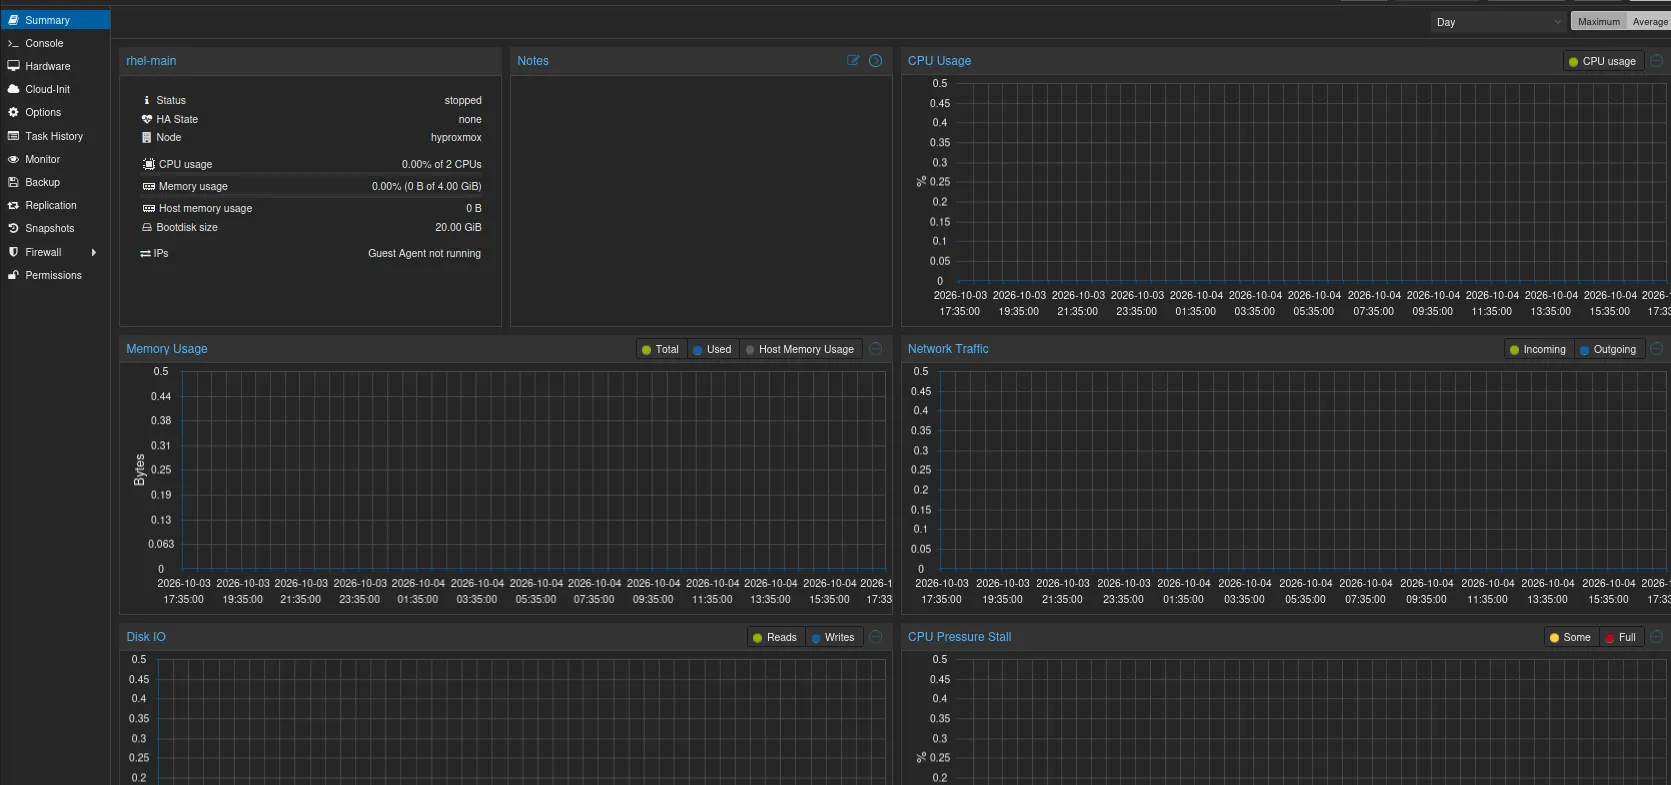
3. Installing RHEL 10 with Anaconda
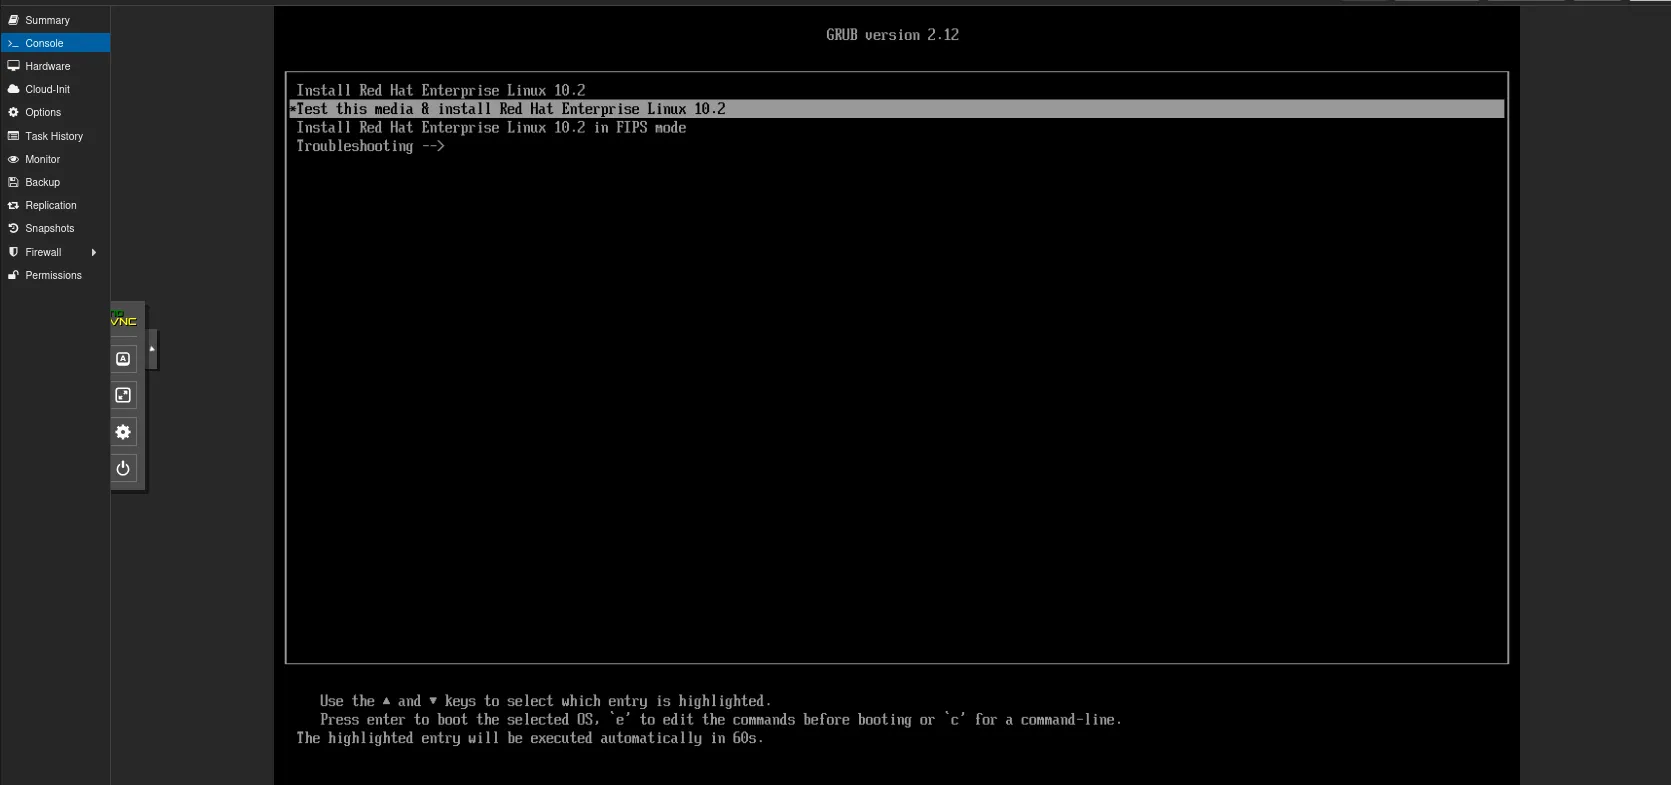
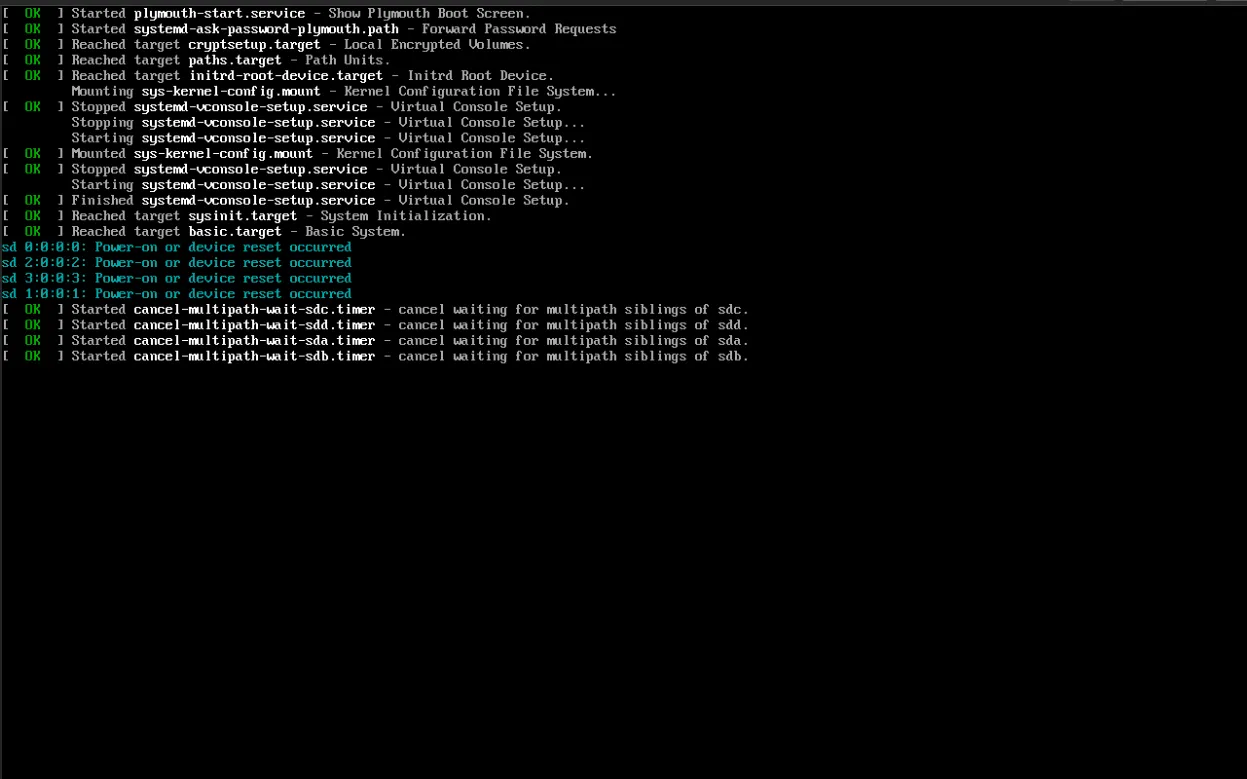
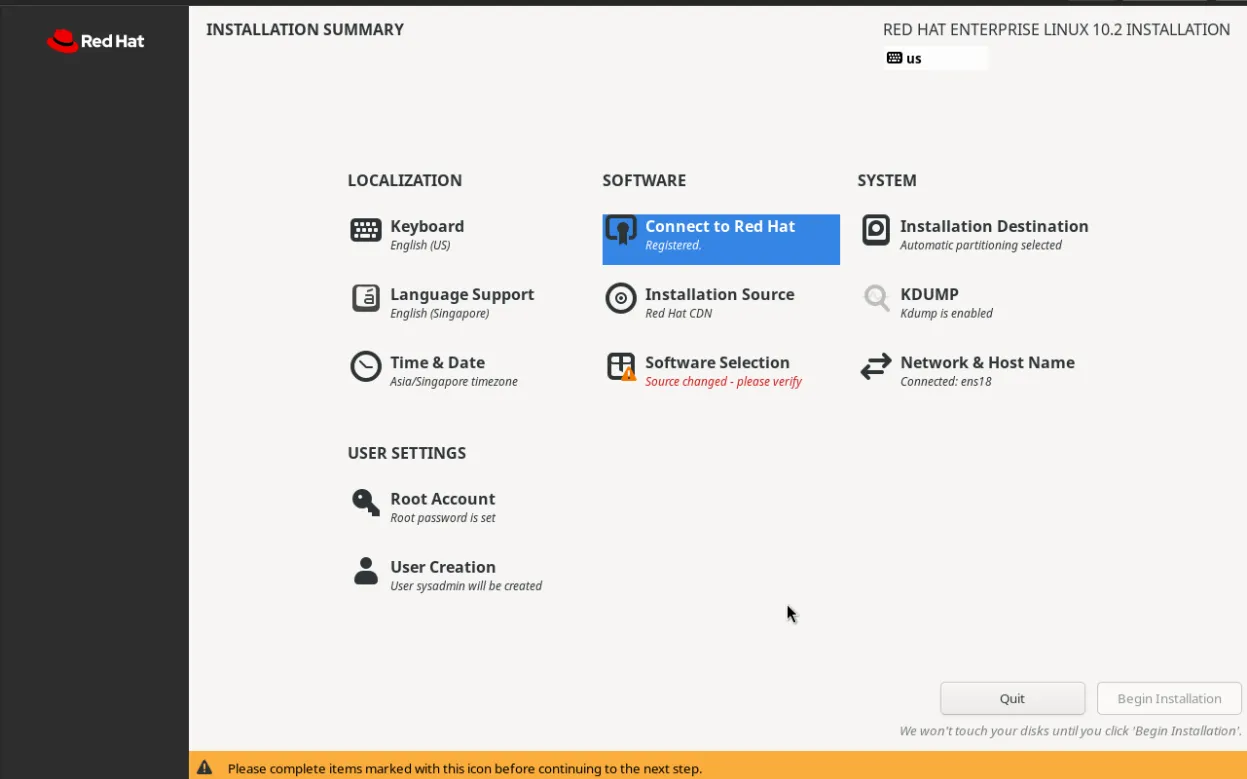
Start the VM, open the console, and choose Install Red Hat Enterprise Linux 10. The installer (Anaconda) presents a hub of sections. Complete each one below. Items with a warning icon must be configured before Begin Installation becomes available.
3.1 Language and keyboard
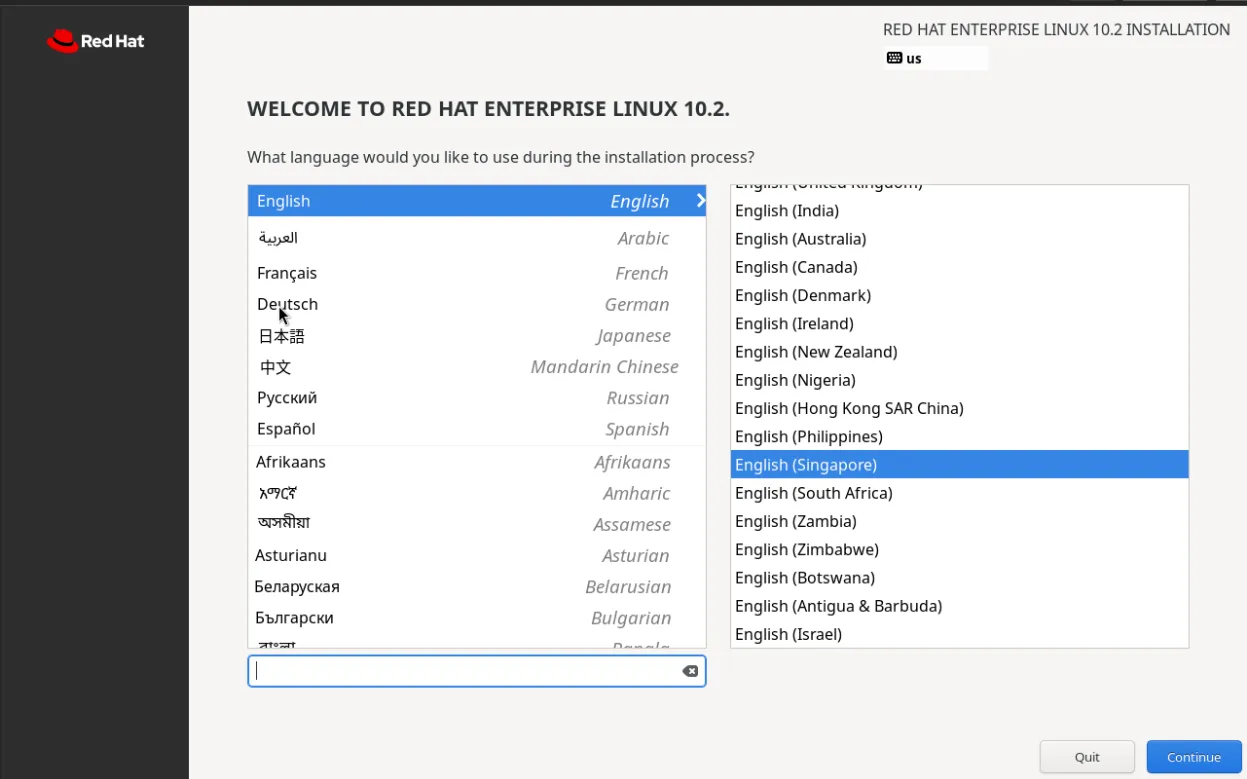
- Select: English (Singapore).
- Why: A standard locale avoids encoding surprises in scripts,
grepoutput, andmanpages. It also matches what you will see on the exam.
Note: I’m based in Singapore but you are definitely free to choose your locale
3.2 Network and hostname
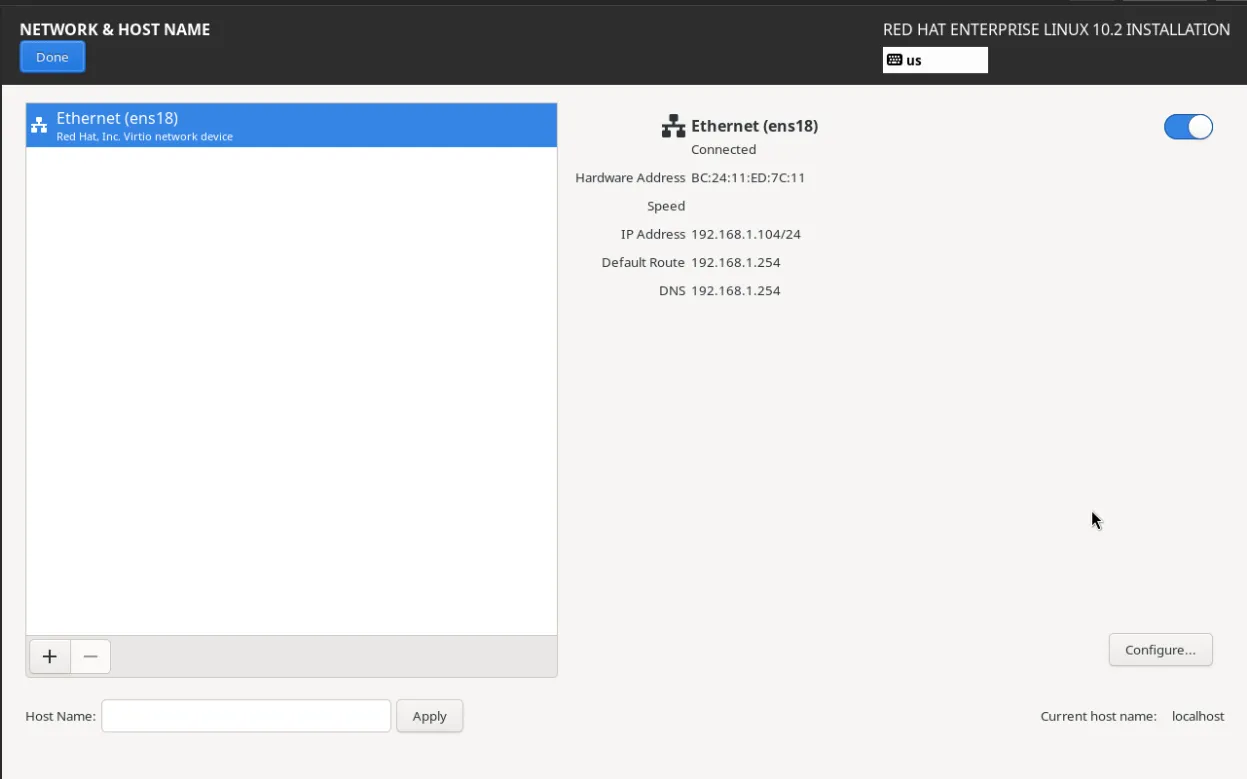
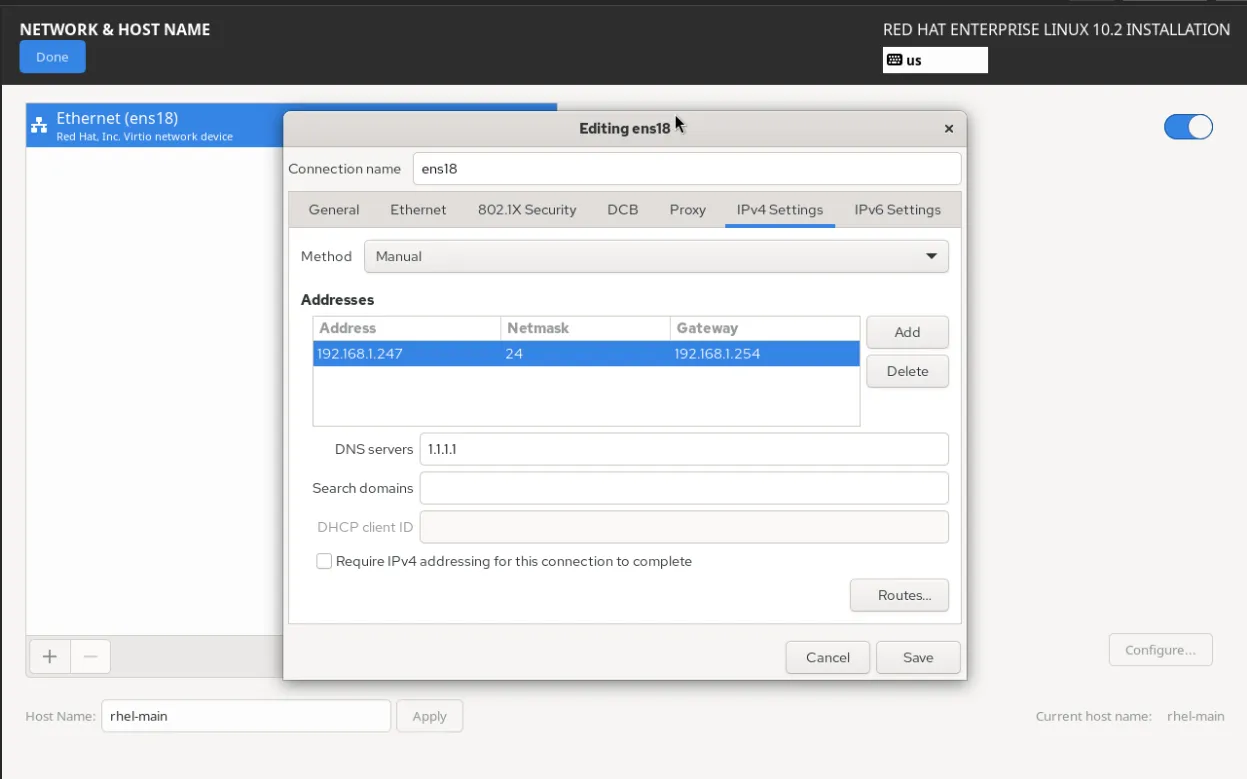
- Enter the hostname
rhcsa-mainand click Apply. - Select the network interface (typically
ens18or a name likeenp6s18), click Configure, open IPv4 Settings, and choose Manual. - Add an address (for example
192.168.1.50/24), a gateway (192.168.1.1), and DNS servers (192.168.1.1or1.1.1.1). Adjust to your own network.
Why a static IP? Ansible stores hosts in an inventory file. If DHCP changes the address after a lease renewal, your inventory silently breaks. A fixed address also keeps SSH known_hosts entries valid.
Why a fully qualified hostname? Using name.domain mirrors real environments, and the hostname and its resolution are themselves exam topics (Manage basic networking: configure hostname resolution). You can practice hostnamectl and /etc/hosts later.
3.3 Installation destination (partitioning)
This is the most important step for the lab design.
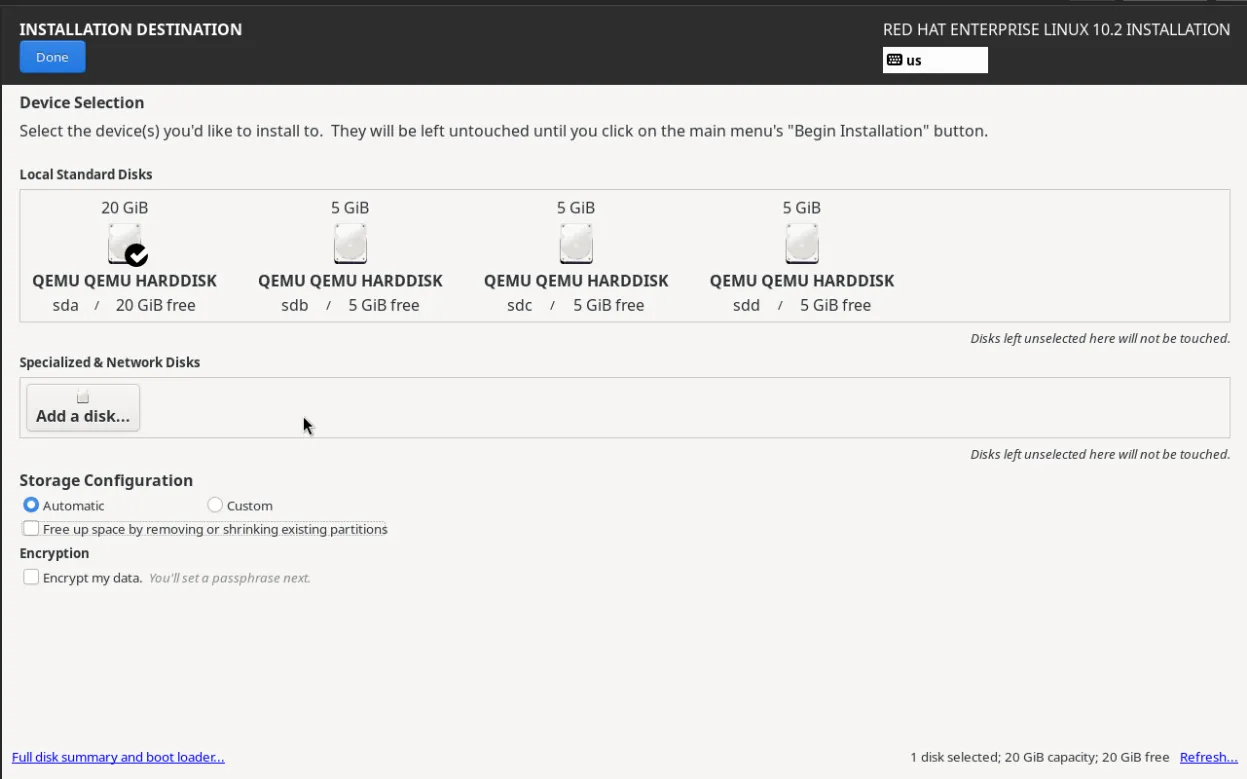
- Under Local Standard Disks, tick only the 20 GiB OS disk (
sda). Untick the three 5 GiB disks (sdb,sdc,sdd). If they are selected, Anaconda will format them and you lose your blank practice disks. - Under Storage Configuration, choose Custom and click Done.
- In the partitioning screen, set the scheme to LVM and click + to add each mount point:
| Mount point | Size | Device type | File system | Purpose |
|---|---|---|---|---|
/boot/efi |
600 MiB | Standard partition | EFI System Partition | Holds the UEFI bootloader files. Required for UEFI boot. |
/boot |
1 GiB | Standard partition | XFS (or ext4) | Kernel and initramfs. It stays outside LVM so the bootloader can read it simply. |
/ |
16 GiB | Logical Volume (VG rhel) |
XFS | The root file system. XFS is the RHEL default. |
swap |
2 GiB | Logical Volume (VG rhel) |
swap | System swap space. |
- Click Done, review the summary of changes, and click Accept Changes.
Why this layout?
- Custom instead of automatic: Automatic partitioning hides the decisions. Doing it yourself shows you how the pieces fit, which helps when you later extend logical volumes or fix a mount problem.
- LVM for
/and swap: It lets you practice growing and inspecting logical volumes on the OS disk withlvs,vgs, andlvextend. - Sizes add up to about 19.6 GiB, leaving a small margin on the 20 GiB disk for LVM metadata and partition alignment.
- Untouched extra disks: They stay raw so you can practice
fdisk,gdisk,parted,pvcreate,vgcreate,lvcreate,mkfs.xfs,mkfs.ext4, andmkfs.vfatyourself.
3.4 Software selection
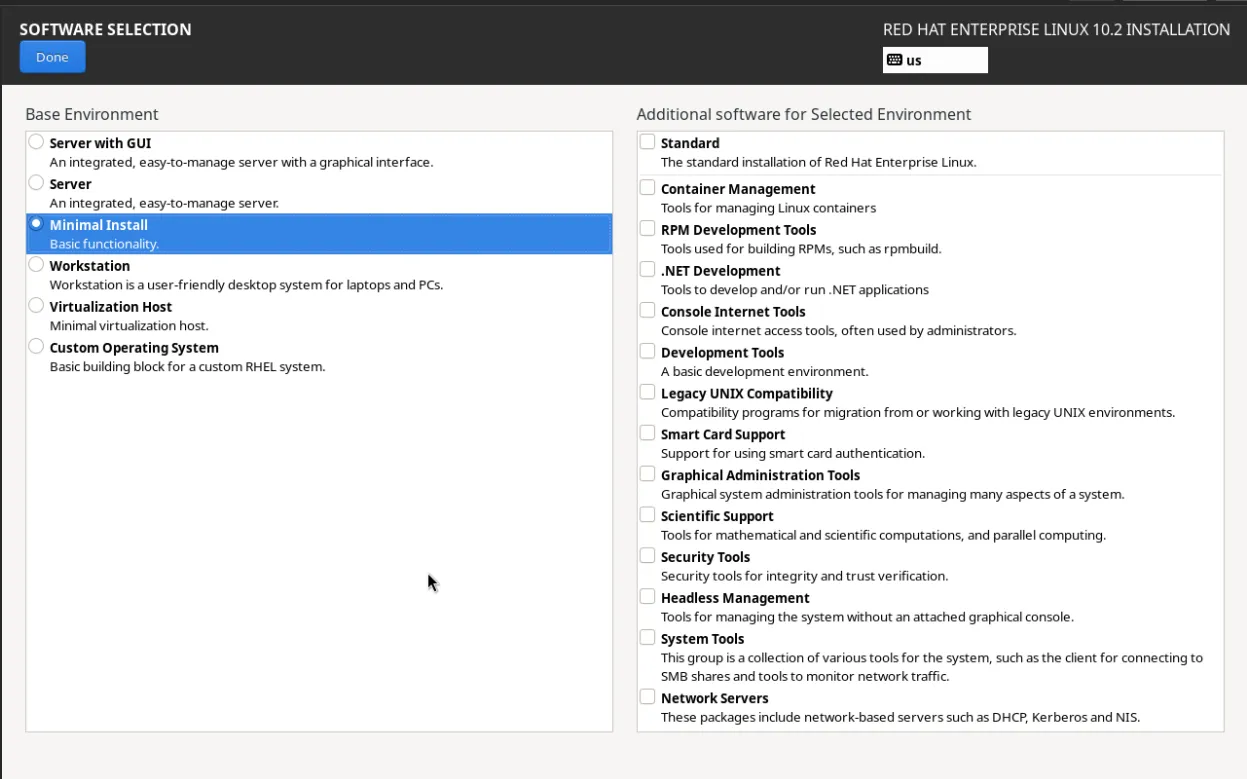
- Base environment: Minimal Install. Leave additional software unticked.
- Why: The exam provides lean systems, and you are expected to install what you need. Practice this now with tools such as
tar,bind-utils,autofs,nfs-utils,firewalld,policycoreutils-python-utils, andman-pages. Note that a minimal install may not include man pages; installing them is also good practice for the objective Locate, read, and use system documentation.
3.5 Users and access control
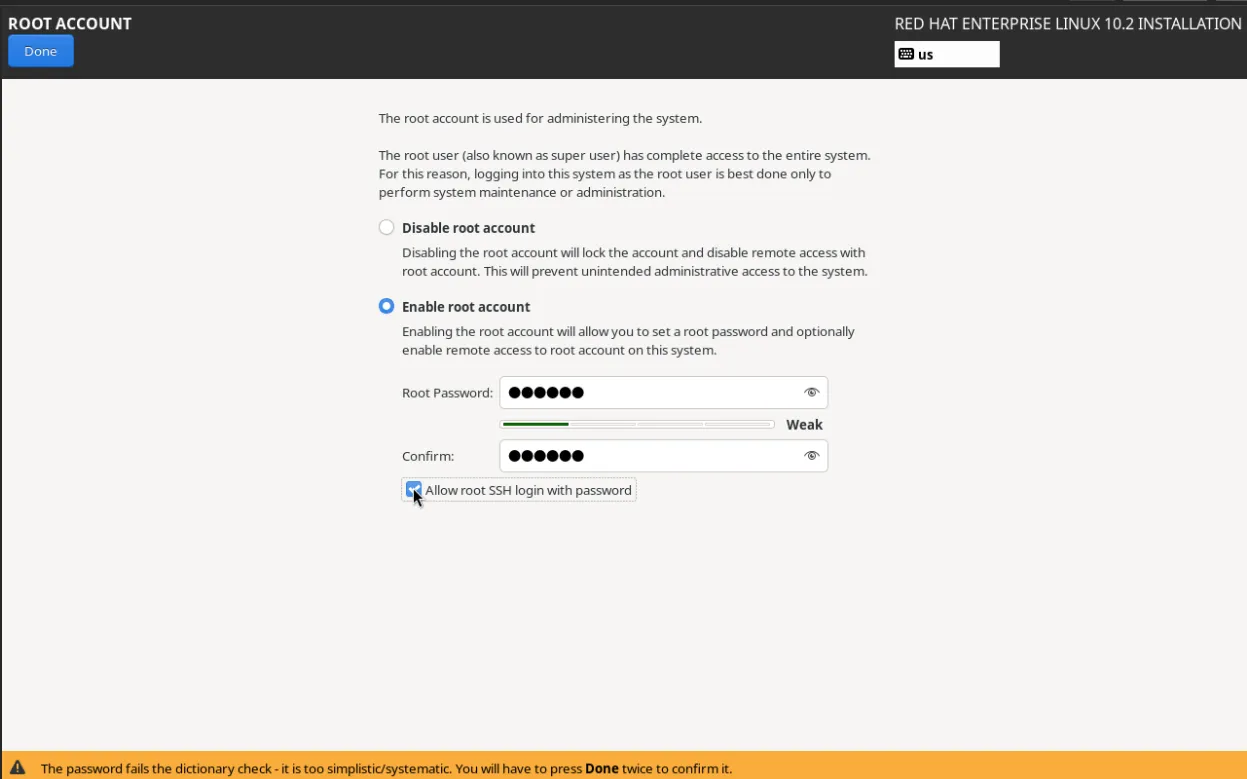
- Root account: Set a strong password and enable Allow root SSH login with password for initial setup only. You will switch to key-based authentication later.
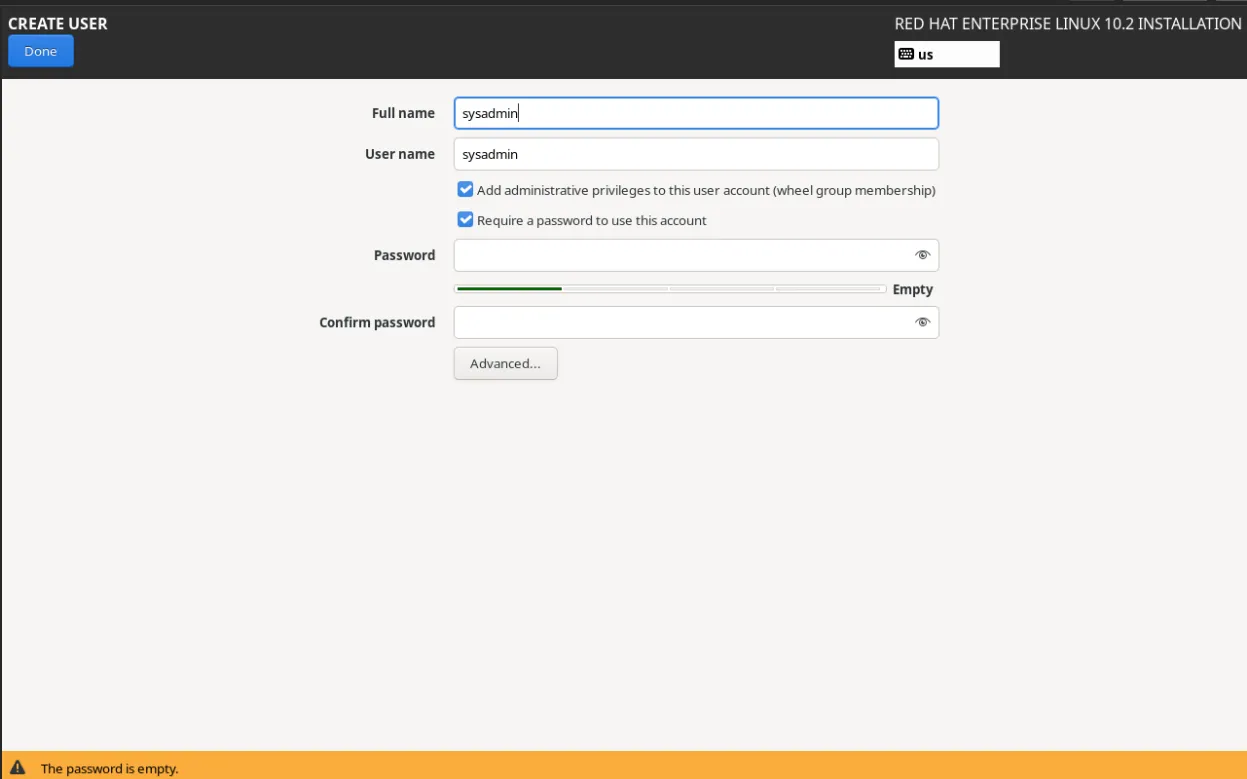
- Create user: Username
sysadmin(oransible). Untick “Make this user administrator.” Set a password.
Why leave the user unprivileged? On a fresh system the user is not in the wheel group, so you can practice the objective Configure privileged access yourself: adding the user to wheel or writing a file in /etc/sudoers.d/. In the Ansible section below, that exercise becomes real work.
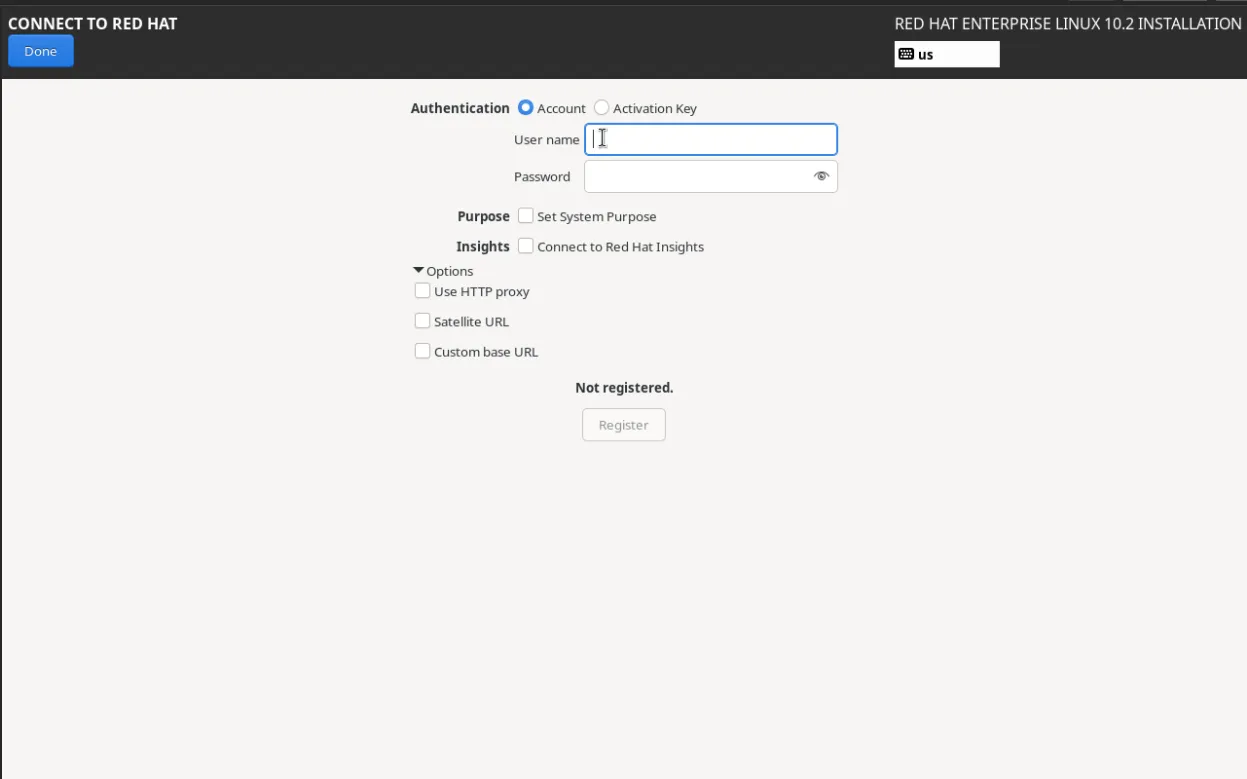
3.6 Subscription and registration
- Setting: Skip registration in the installer.
- Why: Registering from the command line after the first boot is a skill worth rehearsing, and it lets you practice managing repositories afterward (see below).
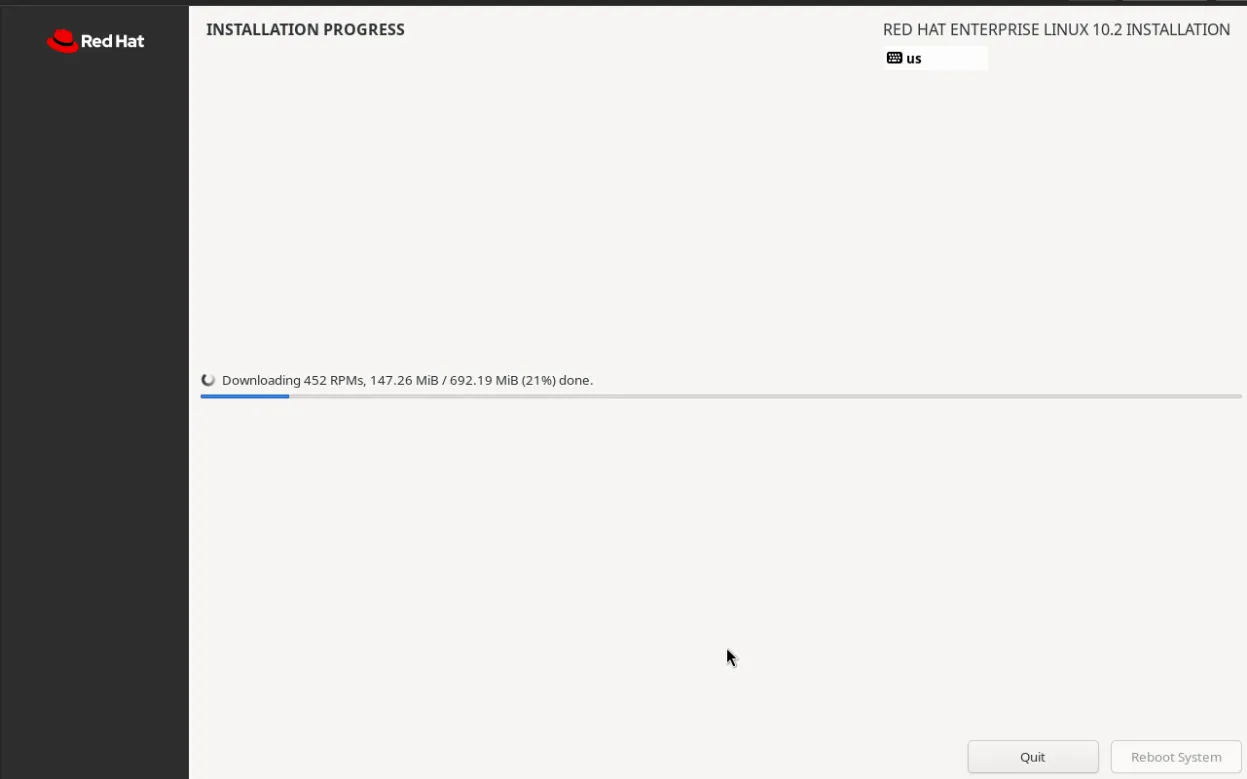
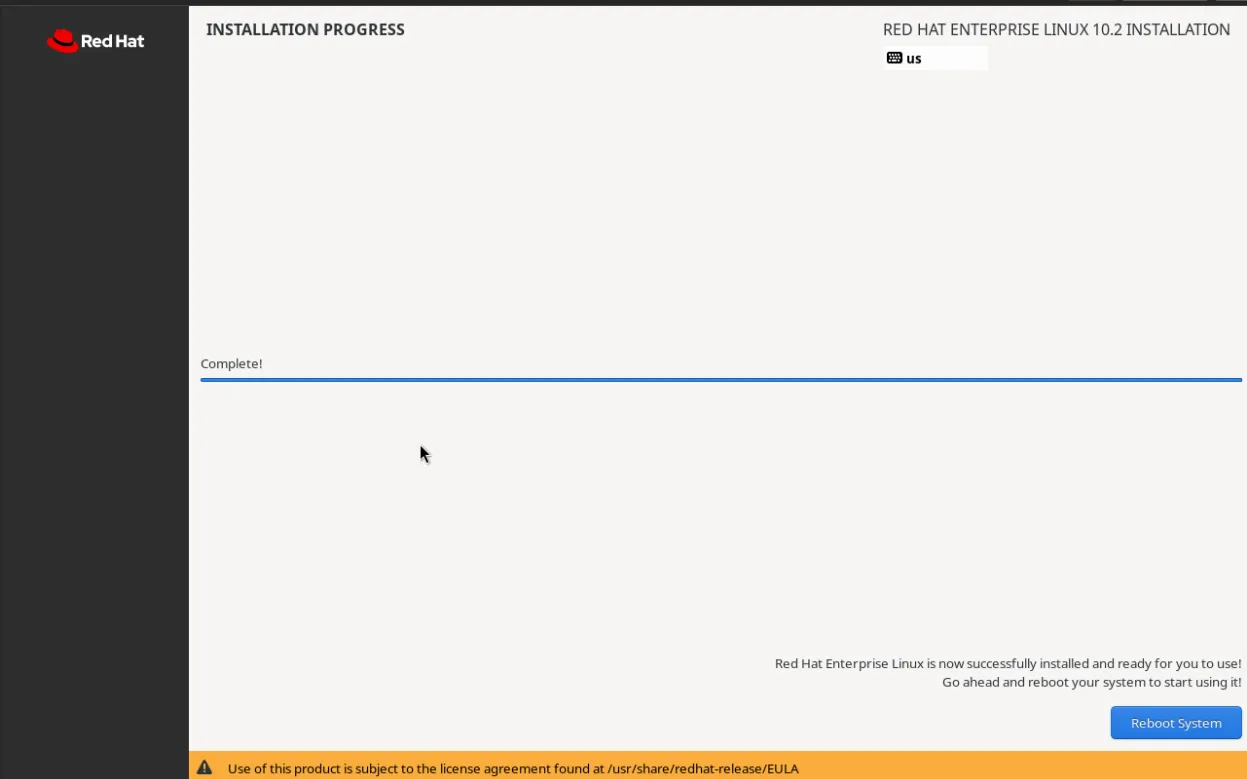
Click Begin Installation, wait for it to finish, then Reboot System. At the first prompt, remove or unmount the ISO in Proxmox if it tries to boot the installer again.

4. First Boot: Verify the Build
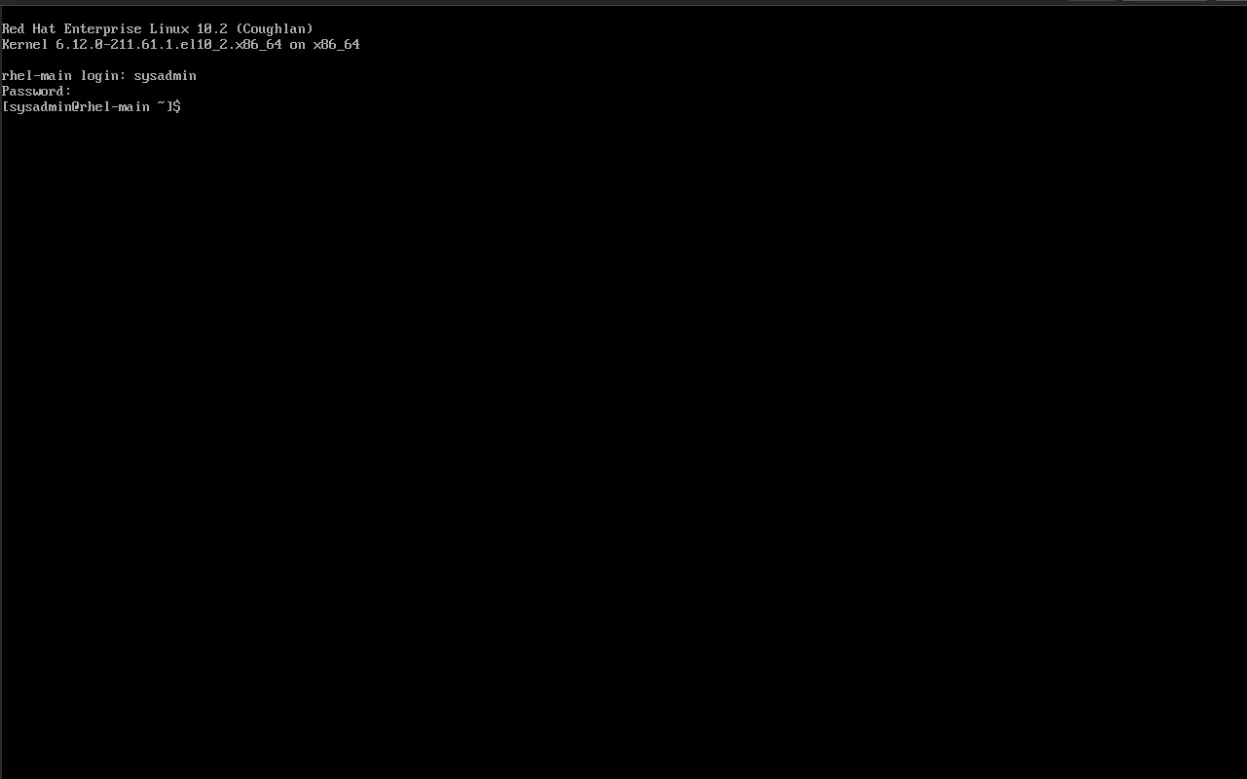
Log in as root on the console and confirm the install matches your design:
cat /etc/os-release          # confirm RHEL 10
hostnamectl                  # hostname and kernel
ip -br address               # static IP on the interface
lsblk                        # sda partitioned; sdb, sdc, sdd empty
getenforce                   # should print: Enforcing
systemctl is-active firewalld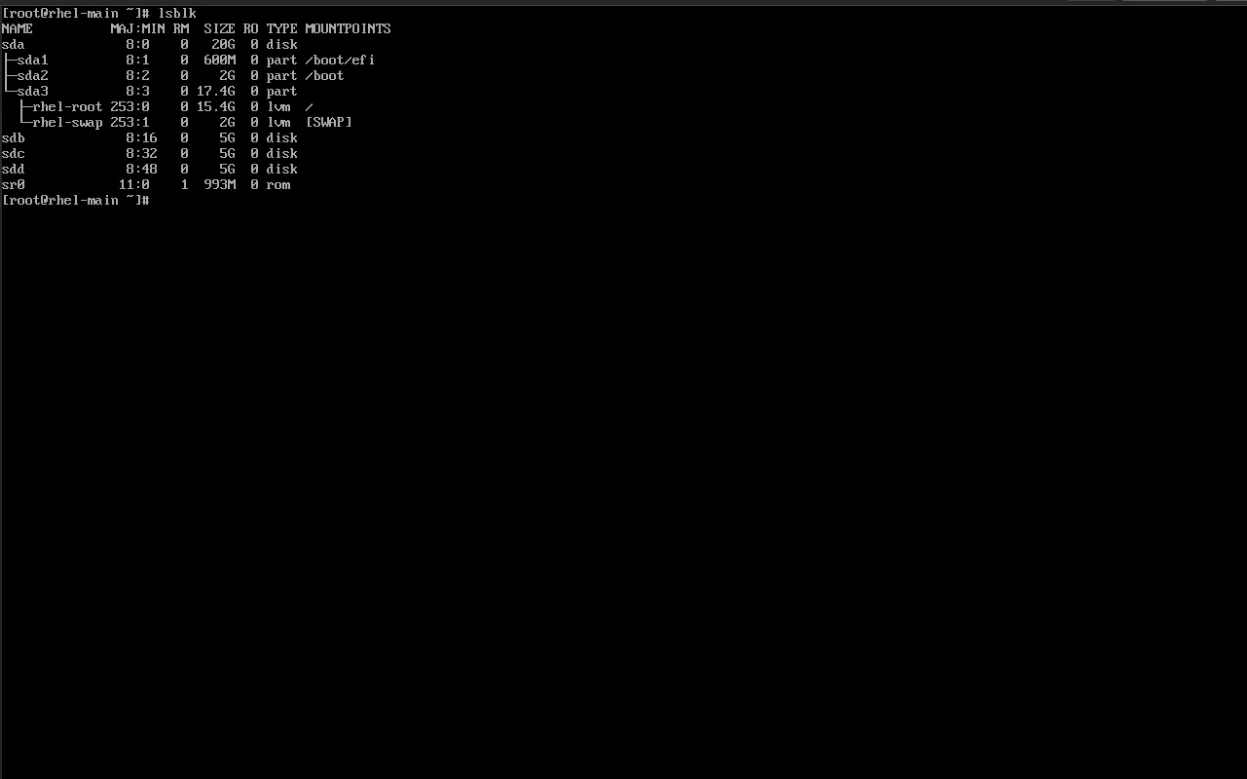
What to look for:
lsblkshould showsdb,sdc, andsddwith no partitions or mount points.getenforceshould printEnforcing. Leave SELinux enforcing andfirewalldrunning. The exam expects both, and you will learn far more by fixing a denied access than by disabling the protection.
Register the system and check repositories
subscription-manager register --username=<your_user> --password=<your_pass>
subscription-manager status
dnf repolist
This connects the VM to the Red Hat Content Delivery Network (CDN) so dnf can install and update packages. Later, practice adding a local repository file in /etc/yum.repos.d/, because the exam may require configuring access to a repository.
5. Ansible and Post-Install Integration
Now connect the VM to your Ansible controller (an LXC container or any management workstation).
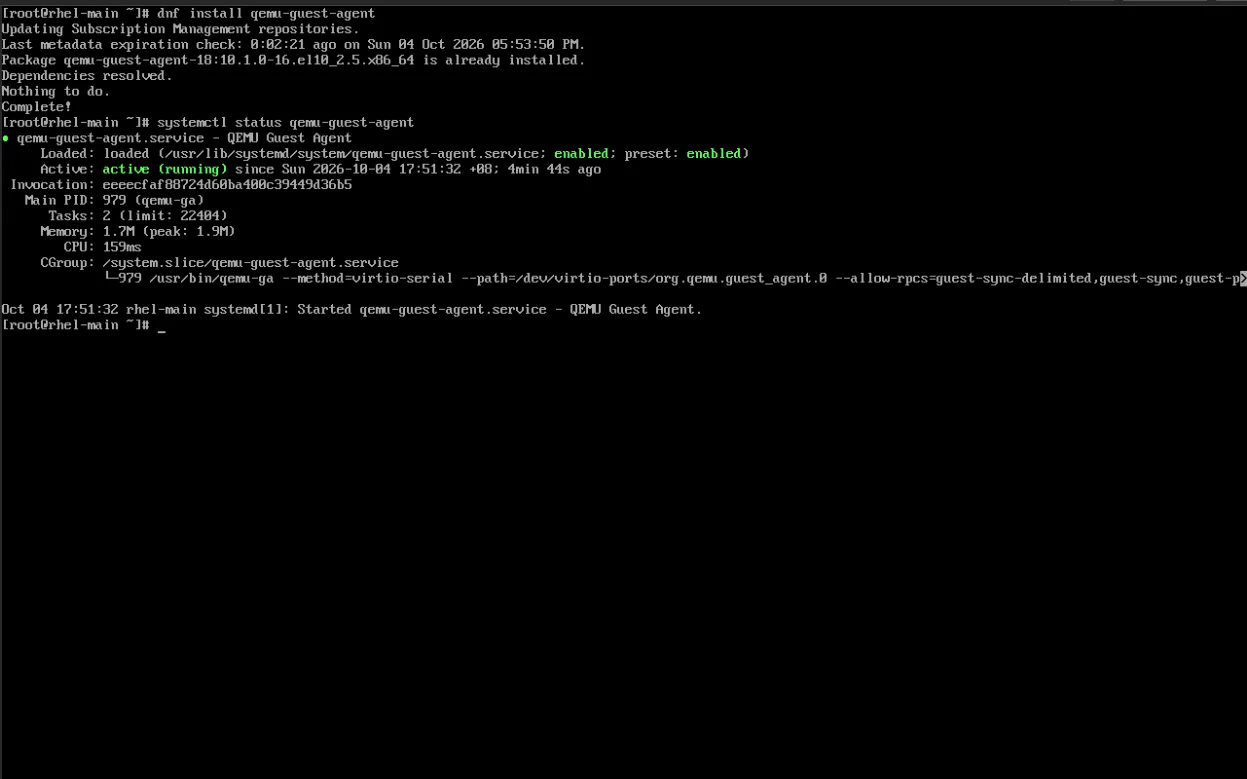
Step 1: Install the QEMU guest agent
dnf install -y qemu-guest-agent
systemctl enable --now qemu-guest-agent
Why: Proxmox can only report the VM’s IP, shut it down cleanly, or take a consistent snapshot if an agent is running inside the guest. Enabling the checkbox in Proxmox is only half of the setup.
Verify: The Proxmox Summary tab for the VM should now show the IP address.
Step 2: Grant passwordless sudo to the sysadmin user
echo "sysadmin ALL=(ALL) NOPASSWD: ALL" > /etc/sudoers.d/sysadmin
chmod 0440 /etc/sudoers.d/sysadmin
visudo -cf /etc/sudoers.d/sysadmin    # validate syntax
Why:
- Ansible’s
--becomeoption runs tasks with elevated privileges. WithoutNOPASSWD, every task would prompt for a password and playbooks would hang. - Files in
/etc/sudoers.d/are the recommended way to add rules, because the main/etc/sudoersfile stays untouched. - Mode
0440is required:sudoignores or rejects drop-in files with loose permissions. visudo -cfchecks the syntax. A typo in a sudoers file can lock you out of privilege escalation entirely.
Lab-only warning. Passwordless sudo for all commands is convenient but weak security. Use it only in a disposable lab. For the exam, also practice the password-required variant and group-based rules (for example
%wheel ALL=(ALL) ALL).
Step 3: Set up key-based SSH from the controller
On the Ansible controller:
# Create a keypair (skip if you already have one)
ssh-keygen -t ed25519 -N "" -f ~/.ssh/id_ed25519

# Copy the public key to the managed node
ssh-copy-id sysadmin@192.168.1.50
Why:
- ed25519 keys are short, fast, and considered strong. They are the modern default.
ssh-copy-idappends your public key to~/.ssh/authorized_keyson the target with correct permissions. This directly maps to the exam objective Configure key-based authentication for SSH.-N ""creates a key without a passphrase, which is fine for a lab and convenient for automation. Use a passphrase plusssh-agentfor real keys.
Once key login works, go back and tighten the node: set PermitRootLogin prohibit-password (or no) in /etc/ssh/sshd_config, then reload with systemctl reload sshd.
Step 4: Test Ansible connectivity
Create an inventory file called hosts on the controller:
[rhcsa_nodes]
192.168.1.50 ansible_user=sysadmin
Run Ansible’s ping module with privilege escalation:
ansible rhcsa_nodes -i hosts -m ping --becomeExpected output:
192.168.1.50 | SUCCESS => {
    "changed": false,
    "ping": "pong"
}
What this proves: SSH works with your key, Python is available on the managed node, and sudo escalation succeeds. Note that Ansible’s ping is not an ICMP ping; it tests the entire automation path.
Step 5: Take a baseline snapshot
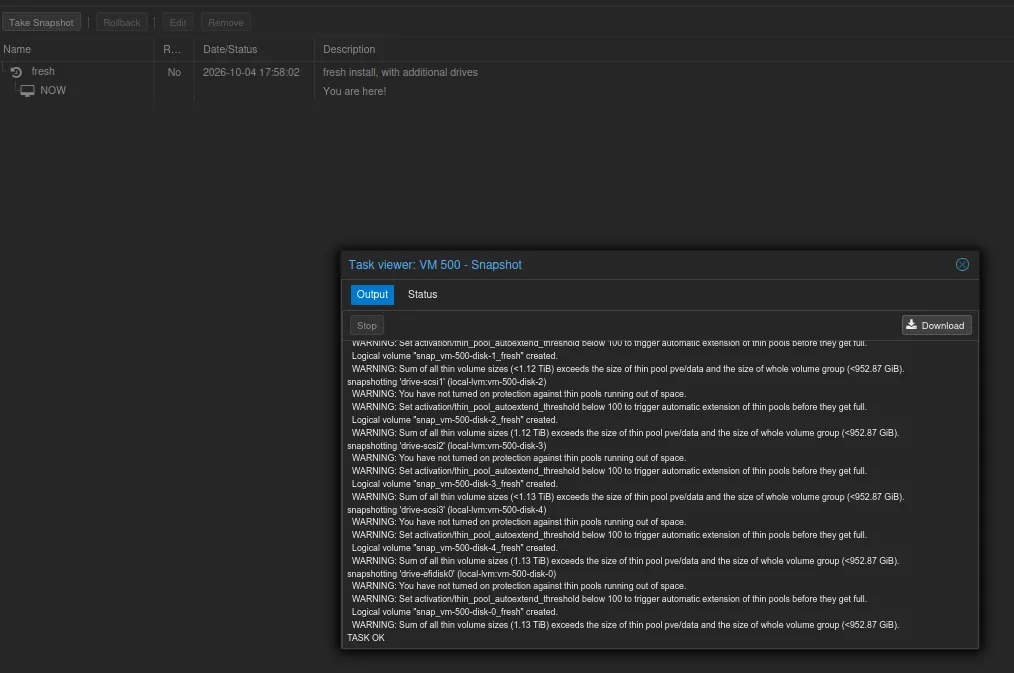
In Proxmox, select the VM, open Snapshots, and click Take Snapshot. Name it something like clean-baseline.
Why: Your practice will include destructive tasks such as breaking the bootloader, resetting the root password, or misconfiguring fstab. A snapshot lets you roll back in seconds instead of reinstalling. Retake it whenever you reach a new known-good state.
6. How This Lab Maps to the RHCSA Syllabus
| Exam area | What this lab lets you practice |
|---|---|
| Understand and use essential tools | SSH from the controller, grep/redirection, tar, links, permissions, man and /usr/share/doc |
| Manage software | Registering with the CDN, configuring RPM and Flatpak repositories, installing packages |
| Create simple shell scripts | Write scripts on the VM and run them as sysadmin |
| Operate running systems | Boot targets, interrupting boot (use the Proxmox console), journalctl, top, nice, tuned |
| Configure local storage | Disks 1–3: GPT partitions, PVs, VGs, LVs, swap, UUID/label mounts |
| Create and configure file systems | Format as VFAT/ext4/XFS, NFS and autofs, extend LVs, fix permissions |
| Deploy, configure, and maintain systems | cron, at, systemd timers, chrony, GRUB changes, default targets |
| Manage basic networking | Static IPv4/IPv6 with nmcli, hostname resolution, firewall-cmd |
| Manage users and groups | useradd, chage, groups, sudoers |
| Manage security | SELinux modes, contexts, port labels, booleans; firewalld; key-based SSH |
Remember the exam’s golden rule: every change must persist after a reboot. After each exercise, reboot the VM and confirm that mounts, services, firewall rules, and SELinux settings are still correct. Examples: use
--permanentwithfirewall-cmd,systemctl enablefor services, and/etc/fstabentries (by UUID or label) for mounts.
Summary
You now have a repeatable RHCSA lab: a UEFI RHEL 10 VM with a minimal install, blank disks for storage practice, SELinux and firewalld active, and a working Ansible connection. Each decision was made to either mirror the exam or make practice safer and faster.
Next steps: begin with the storage disks (partitions, then LVM), snapshot before every risky exercise, and reboot after every task to verify persistence.