Introduction
In this guide, I document the end-to-end process of provisioning an optimized EVE-NG virtual machine on Proxmox VE 9.2.2. By the end of this post, you will have a fully functional, web-accessible EVE-NG environment running on KVM nested virtualization, hardened against storage exhaustion and tuned for high-density lab workloads.
When choosing between EVE-NG and GNS3 on a bare-metal hypervisor like Proxmox VE, EVE-NG stands out for server deployments:
- Zero Client Footprint: EVE-NG runs as a headless Linux server hosting a native HTML5 web UI. Topologies, serial consoles, and live packet captures are accessed directly through any web browser without needing local client software state synchronization.
- Server-Native Architecture: Unlike GNS3—which relies on a client-server model connecting a desktop app to a remote VM—EVE-NG is built from the ground up as a standalone server appliance.
Environment & Hardware Overview
The host system is a compact mini PC running Proxmox VE 9.2.2. Because this host already runs production homelab workloads, system resources must be budgeted with precision to avoid RAM thrashing.
| Component / Layer | Specification / Version | Allocation Strategy |
|---|---|---|
| Host CPU | AMD Ryzen 5 7640HS (6 Cores / 12 Threads) | 8 vCPUs assigned (cpu: host for AMD-V nested passthrough) |
| Host System Memory | 32 GB DDR5 RAM | 22 GB (22,528 MB) assigned to EVE-NG; 10 GB reserved for PVE host & idle VMs |
| Host Primary Storage | 1 TB NVMe SSD (pve/data LVM-Thin) |
300 GB sparse disk allocation (discard=on,ssd=1) |
| Hypervisor OS | Proxmox VE (version 9.2.2) | Linux Kernel 6.8+ with kvm_amd module |
| Target Network Emulator | EVE-NG BASE/RBL Version 7.2.0-18 | Freemium Full ISO release (modern QEMU/KVM stack) |
| Host Network Bridges | vmbr0 (LAN) & vmbr1 (Lab Isolated) |
vmbr0 for EVE management; vmbr1 for isolated trunking |
Architecture Overview
The packet path and management flow transition from your local browser across the LAN into Proxmox’s virtual bridges, down through the EVE-NG hypervisor stack, and into nested virtual networking appliances.
flowchart TD
    subgraph LAN["Local Area Network (192.168.1.0/24)"]
        ClientBrowser["Workstation Browser / SSH Client"]
    end

    subgraph PVE["Proxmox VE Host (hyproxmox)"]
        subgraph NetworkBridges["Proxmox Virtual Bridges"]
            VMBR0["vmbr0 (Management LAN Bridge)"]
            VMBR1["vmbr1 (Isolated Lab Bridge)"]
        end

        subgraph EVEMN["EVE-NG VM (VM ID: 105) - 22GB RAM / 8 vCPUs"]
            Eth0["eth0 (192.168.1.50)"]
            Eth1["eth1 (Lab Trunk)"]
            EVEWeb["HTML5 Web GUI / Guacamole"]
            NestedKVM["Nested KVM / QEMU Engine"]

            subgraph LabNodes["Lab Topology Nodes (Nested)"]
                CiscoIOS["Cisco IOSv / IOSvL2"]
                JunipervJunos["Juniper vJunos Router / Switch"]
            end
        end
    end

    ClientBrowser -->|HTTP:80 / SSH:22| VMBR0
    VMBR0 --- Eth0
    VMBR1 --- Eth1
    Eth0 --> EVEWeb
    EVEWeb --> NestedKVM
    NestedKVM --> CiscoIOS
    NestedKVM --> JunipervJunos
Step-by-Step Provisioning & Deployment
Step 1: Enable and Verify AMD-V Nested Virtualization
EVE-NG runs virtual network appliances (such as Cisco vIOS or Juniper vJunos) inside QEMU/KVM processes within the VM. This requires nested virtualization (KVM inside KVM) enabled on the physical Proxmox host.
- SSH into your Proxmox VE host as
root:
ssh root@<PROXMOX_IP> # Replace with your Proxmox host IP- Query the AMD KVM module parameter for nested support:
cat /sys/module/kvm_amd/parameters/nested- Expected Result: Output displays
1orY. - Verification Command:
root@hyproxmox:~# cat /sys/module/kvm_amd/parameters/nested
1
Troubleshooting Note: If the output reads
0orN, enable nested virtualization manually by creating a modprobe rule:echo "options kvm_amd nested=1" > /etc/modprobe.d/kvm-amd.conf modprobe -r kvm_amd && modprobe kvm_amd
Step 2: Configure Proxmox Virtual Network Bridges
EVE-NG benefits from having at least two virtual interfaces:
net0bound tovmbr0: Provides external management IP access on your local LAN.net1bound tovmbr1: An un-addressed, isolated internal bridge for linking lab traffic across multiple VMs or outward to physical interfaces.
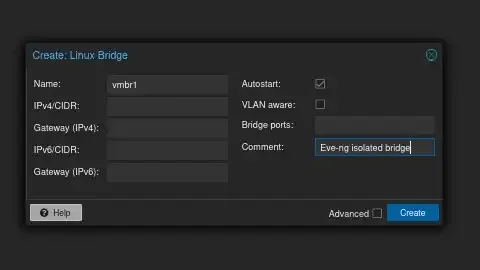
To create vmbr1 directly through the Proxmox Web GUI:
- In the left menu tree, select your Proxmox Node (
hyproxmox). - Navigate to System > Network.
- Click Create in the top action bar and select Linux Bridge.
- Configure the fields:
- Name:
vmbr1 - IPv4/CIDR: (Leave blank) — Maps to
inet manual. - Bridge ports: (Leave blank) — Maps to
bridge-ports none(isolated internal bridge). - Comment:
Lab Isolated Bridge
- Click Create.
- Click Apply Configuration in the top action bar to execute
ifreload -a.
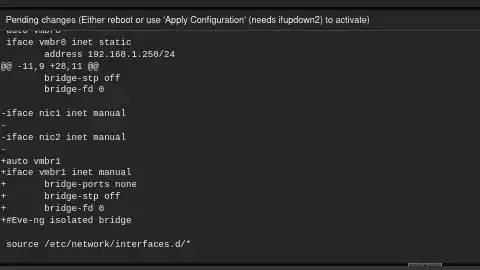
- Expected Result:
vmbr1appears in the interface list with Active: Yes. - Verification Command:
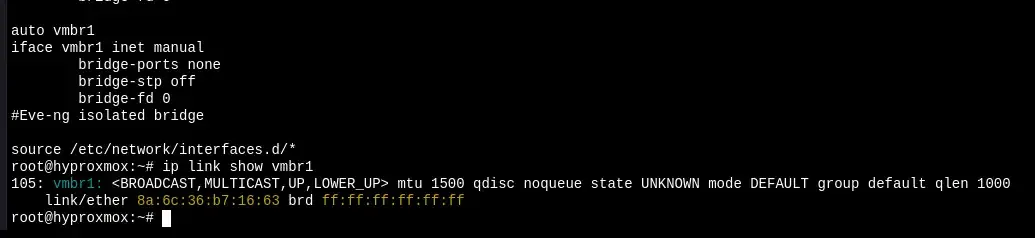
ip link show vmbr1Step 3: Select and Upload the Correct EVE-NG ISO
When downloading EVE-NG, choosing the right distribution build is critical:
| EVE-NG Download Build | License Type | Status / Recommendation |
|---|---|---|
| EVE-NG BASE/RBL v7.2.0-18 (Full ISO) | Freemium | Recommended. Current modern release. Runs fully featured for core routing/switching without requiring a license key. Includes updated Linux kernel and QEMU stack. |
| EVE-NG Community Edition v6.2.0-4 | Open Source | Avoid. Officially EOS/EOL (End of Life). Relies on an obsolete Ubuntu base with broken package repositories during apt-get upgrade. |
| EVE-NG PRO Full ISO | Paid License | Avoid unless licensed. Requires an active subscription key to pass registration and start nodes. |
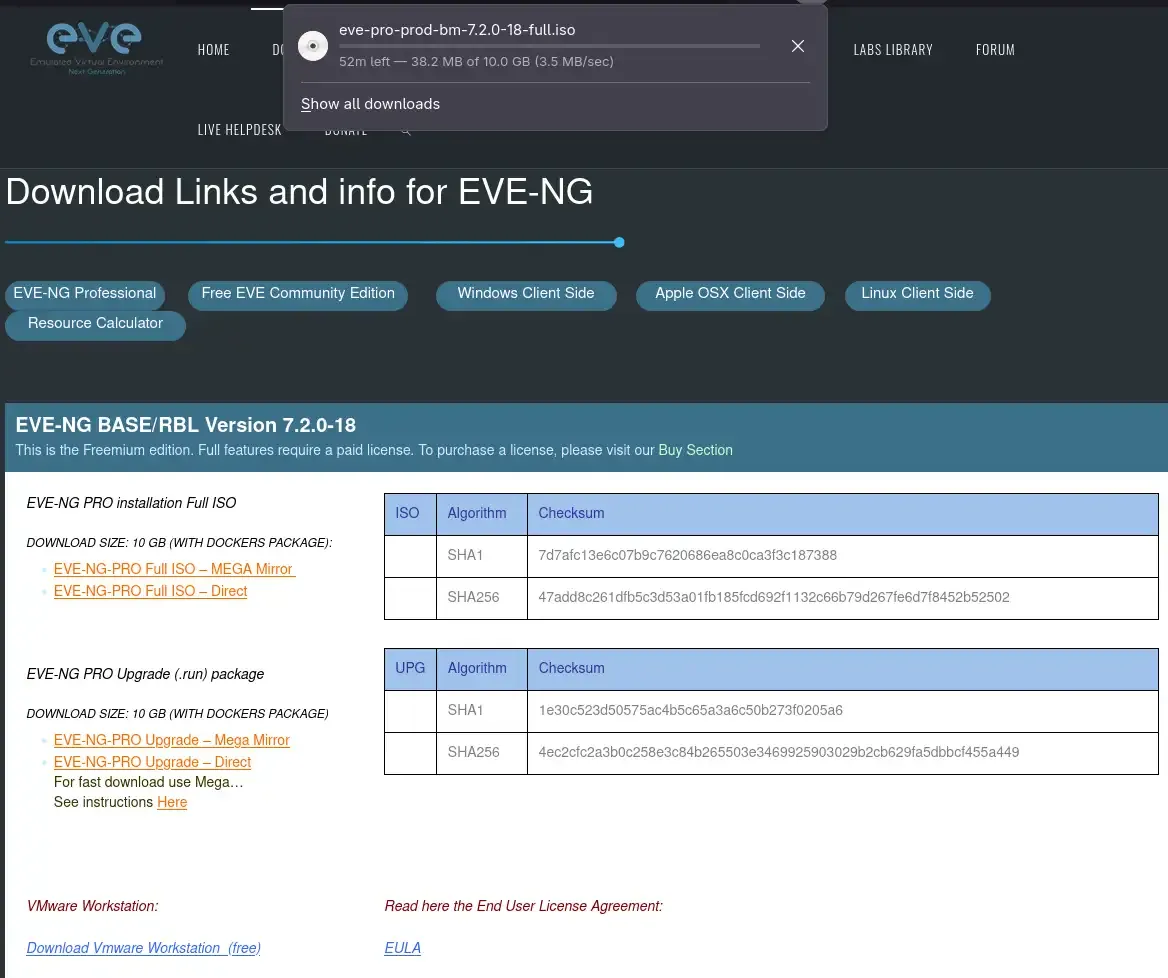
Download the EVE-NG BASE/RBL Version 7.2.0-18 Full ISO and transfer it to your Proxmox ISO template directory /var/lib/vz/template/iso/.
- Verification Command:
ls -la /var/lib/vz/template/iso/EVE-NG-BASE-*.isoStep 4: Provision VM 105 on Proxmox VE
Creating the VM requires specific virtual hardware flags—such as exposing CPU extensions (cpu: host), selecting the virtio-scsi-single storage controller, and configuring disk discarded blocks (discard=on,ssd=1).
Shell Command Execution & Syntax Gotcha
Run the following command on the Proxmox host CLI to instantiate VM ID 105:
qm create 105 --name eve-ng-lab \
  --ostype l26 \
  --cpu host \
  --cores 8 \
  --numa 0 \
  --memory 22528 \
  --net0 virtio,bridge=vmbr0 \
  --net1 virtio,bridge=vmbr1 \
  --scsihw virtio-scsi-single \
  --boot "order=scsi0;ide2" \
  --agent enabled=1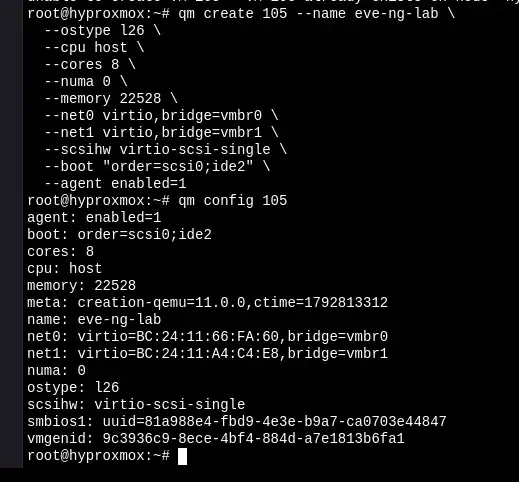
⚠️ Critical Command Syntax Warning: In Bash, an unquoted semicolon (
;) acts as a command separator. If you run--boot order=scsi0;ide2without quotes, Bash treatside2as a separate command and fails with-bash: ide2: command not found. Always enclose"order=scsi0;ide2"in double quotes.
Next, provision the 300 GB NVMe virtual disk image and attach the ISO to the virtual CD-ROM drive:
qm set 105 --scsi0 local-lvm:300,discard=on,ssd=1
qm set 105 --ide2 local:iso/EVE-NG-BASE-7.2.0-18.iso,media=cdrom
Detailed Hardware Settings Table
| Proxmox Configuration Setting | Value Chosen | Engineering Rationale |
|---|---|---|
| VM ID & Name | 105 / eve-ng-lab |
Unique numerical identifier and descriptive hostname. |
OS Type (ostype) |
l26 (Linux 2.6/3.x/4.x/5.x/6.x) |
Optimizes KVM kernel assumptions for modern 64-bit Linux. |
CPU Type (cpu) |
host |
Crucial. Passes host CPU flags (AMD-V / VT-x) directly into the guest VM to enable nested KVM acceleration. |
CPU Cores (cores) |
8 |
Allocates 8 vCPUs. Overcommitted $1.33:1$ against the 6-core/12-thread host CPU for optimal lab handling. |
RAM (memory) |
22528 (22 GB) |
Leaves ~10 GB RAM buffer on the host for system stability and adjacent VMs. |
Network Interfaces (net0, net1) |
virtio,bridge=vmbr0 / virtio,bridge=vmbr1 |
Paravirtualized VirtIO drivers yield highest throughput. Binds net0 to LAN and net1 to isolated bridge. |
Storage Controller (scsihw) |
virtio-scsi-single |
Dedicated SCSI controller per disk; maximizes queue depth performance for concurrent disk writes. |
Disk Provisioning (scsi0) |
local-lvm:300,discard=on,ssd=1 |
300 GB sparse disk. discard=on enables TRIM support; ssd=1 flags drive as solid-state to guest OS. |
Optical Drive (ide2) |
local:iso/EVE-NG-BASE-7.2.0-18.iso |
Mounts the EVE-NG installer ISO for initial boot. |
- Expected Result: VM 105 is successfully configured in Proxmox.
- Verification Command:
qm config 105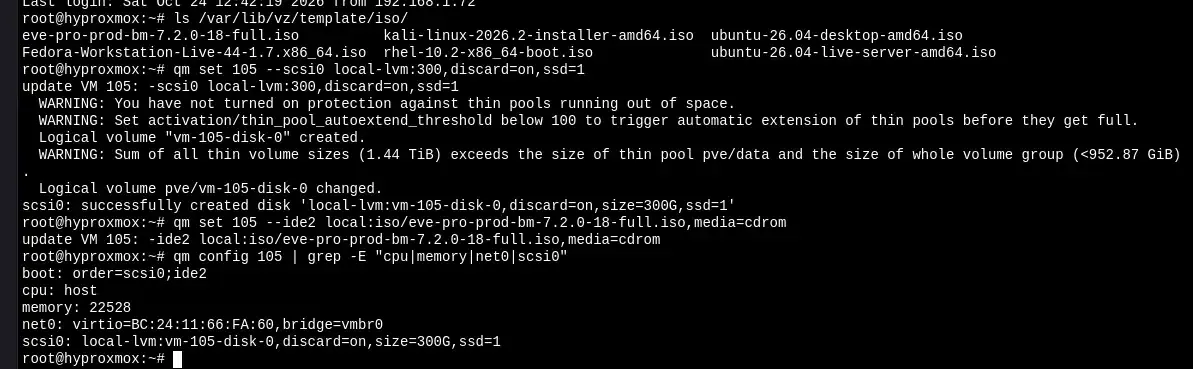
Step 5: Remediate LVM-Thin Storage Overcommitment & Configure TRIM
When creating the 300 GB disk on local-lvm, Proxmox may emit the following warning:
WARNING: You have not turned on protection against thin pools running out of space.
WARNING: Set activation/thin_pool_autoextend_threshold below 100...
Logical volume "vm-105-disk-0" created.
WARNING: Sum of all thin volume sizes (1.44 TiB) exceeds the size of thin pool pve/data and the size of whole volume group (<952.87 GiB).
Understanding the Warning
Proxmox uses LVM-Thin (local-lvm), which allocates virtual storage on demand. A 300 GB disk allocation initially consumes only the actual bytes written by the OS (~10 GB).
However, because total provisioned disk space across all VMs (1.44 TiB) exceeds physical pool capacity (952.87 GiB)—an overcommit ratio of $\approx 1.55 : 1$—if physical usage hits 100%, LVM-Thin cannot allocate blocks, causing all guest VMs to freeze.
Total Provisioned Virtual Disks:  [========================== 1.44 TiB ==========================]
Physical Pool Size (pve/data):   [================ 952.87 GiB ================]
Actual Physical Data Written:    [==== ~250 GiB ====]  <-- Safe operating region
Remediation Steps
- Check Actual Physical Usage on Proxmox:
lvs -a -o lv_name,vg_name,lv_size,data_percent,metadata_percent pve/dataEnsure the Data% column remains below 80%.
- Enable LVM Thin Pool Autoextend Safeguards:
Edit /etc/lvm/lvm.conf on the Proxmox host:
nano /etc/lvm/lvm.confUpdate the autoextend settings under the activation block:
thin_pool_autoextend_threshold = 80
thin_pool_autoextend_percent = 10
Explanation: When pve/data hits 80% physical capacity, LVM automatically extends the pool by 10% if unallocated physical extents exist in the volume group.
- Enable Periodic TRIM inside Guest VMs:
Because disk scsi0 was provisioned with discard=on,ssd=1, file deletions inside guest VMs can return freed blocks back to local-lvm. Once inside the EVE-NG VM, enable the systemd TRIM timer:
sudo systemctl enable --now fstrim.timerStep 6: Complete Installation & the First-Boot Setup Wizard
- Start VM 105 in Proxmox and open the console:
qm start 105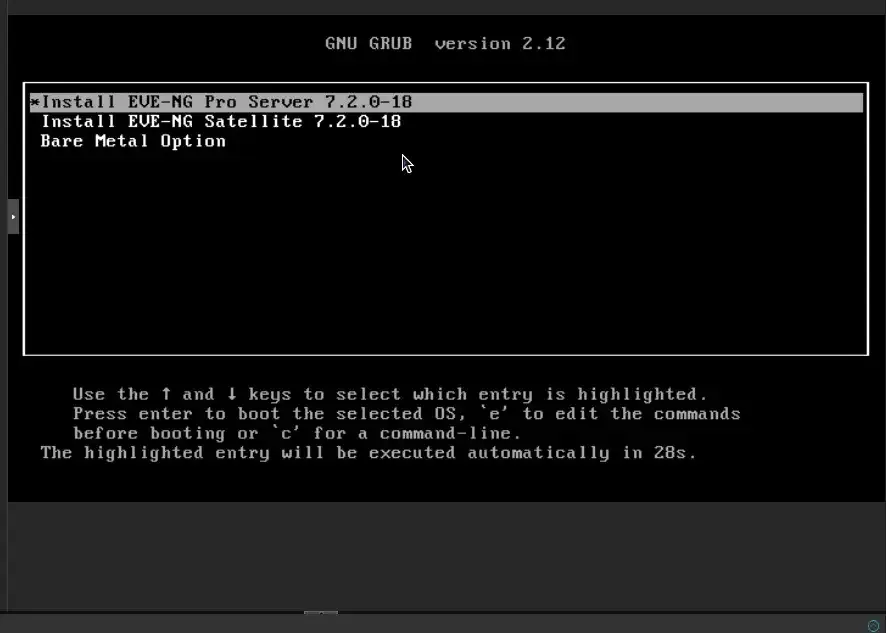
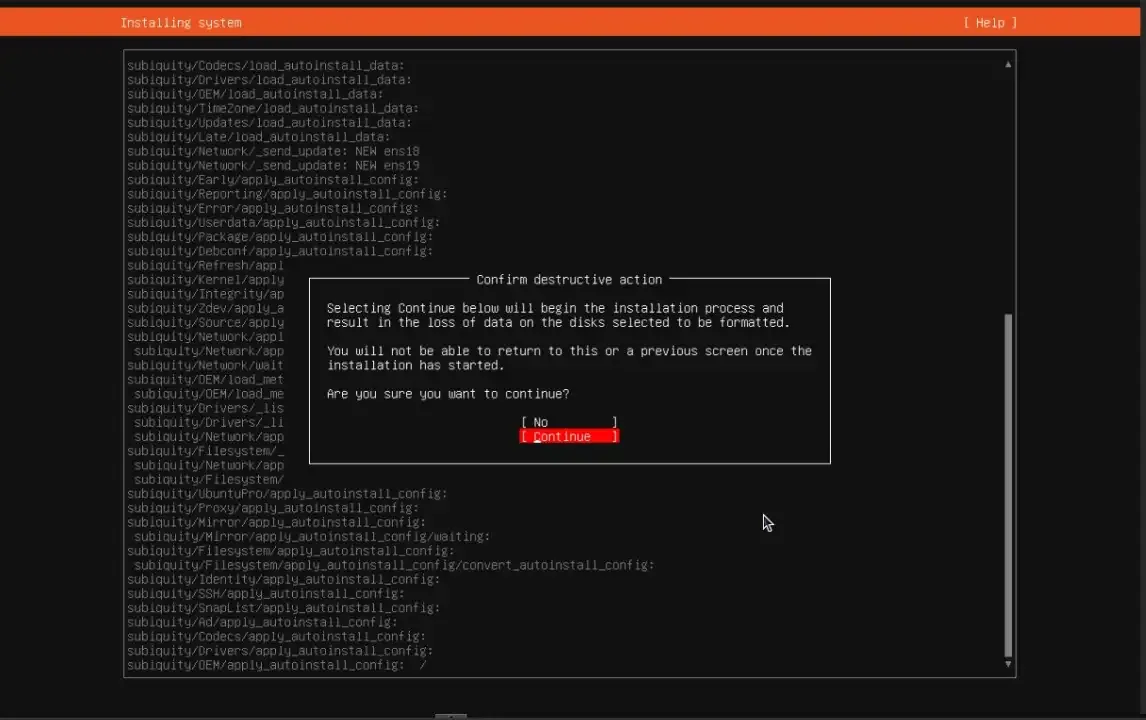
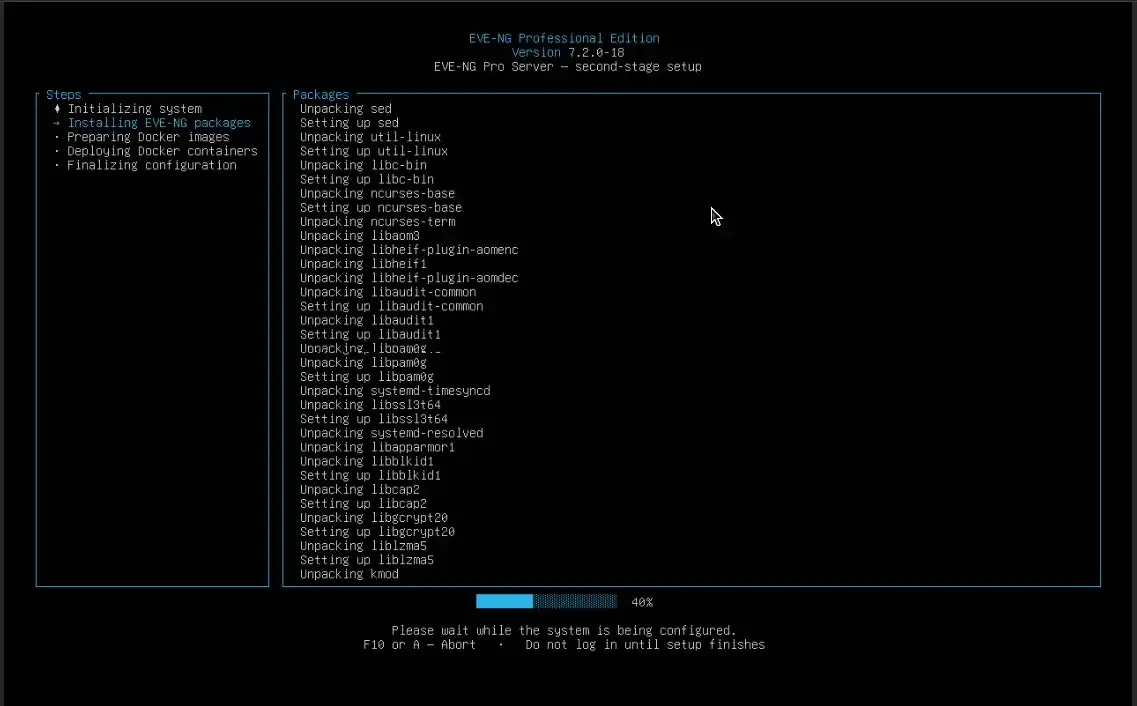
- Open the Proxmox VNC Console for VM 105. Walk through the standard Ubuntu server base installer.
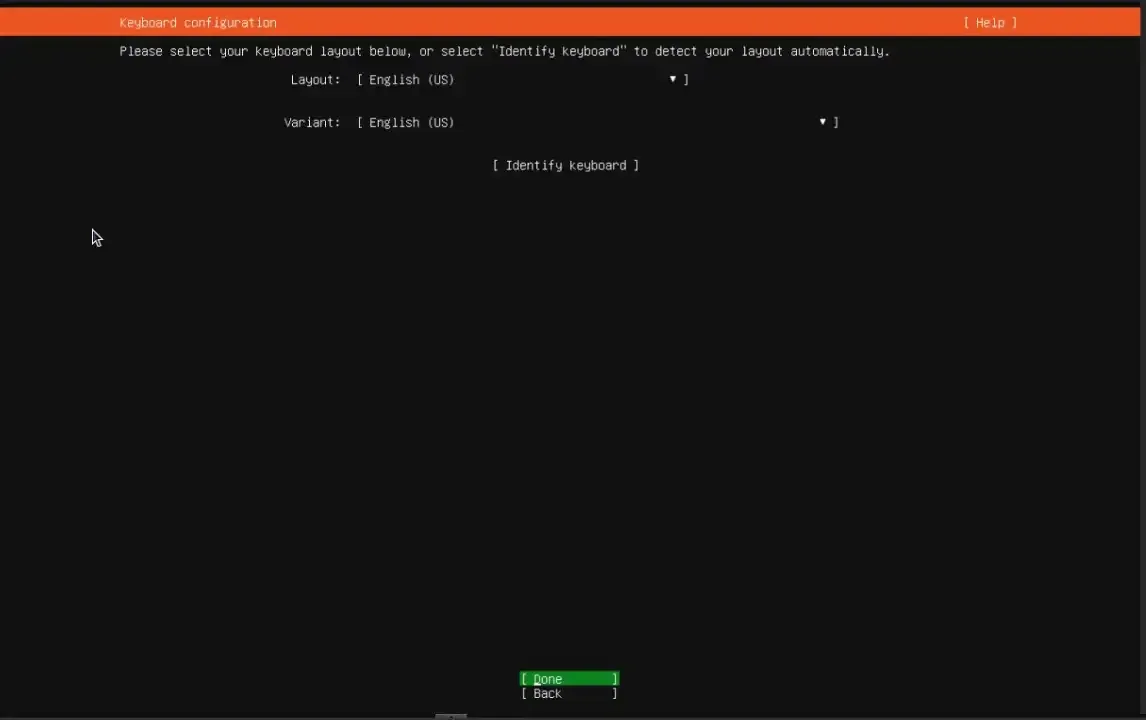
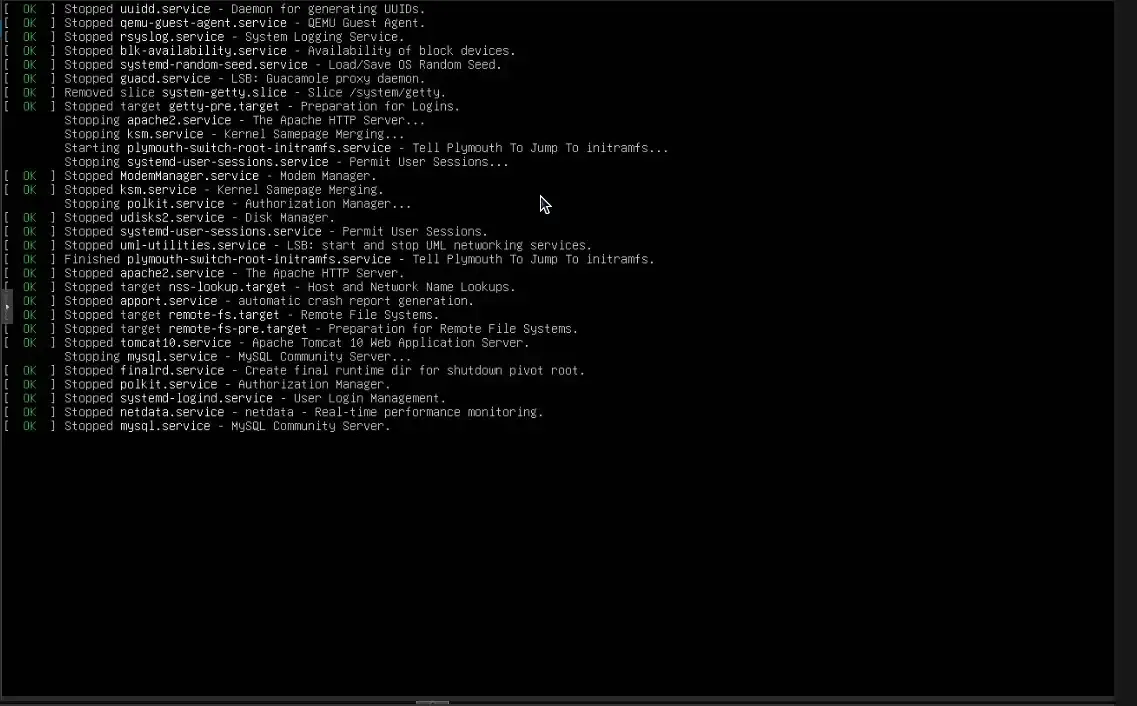
- Once installation completes and the VM reboots, log in at the terminal console with default credentials:
- Username:
root - Password:
eve
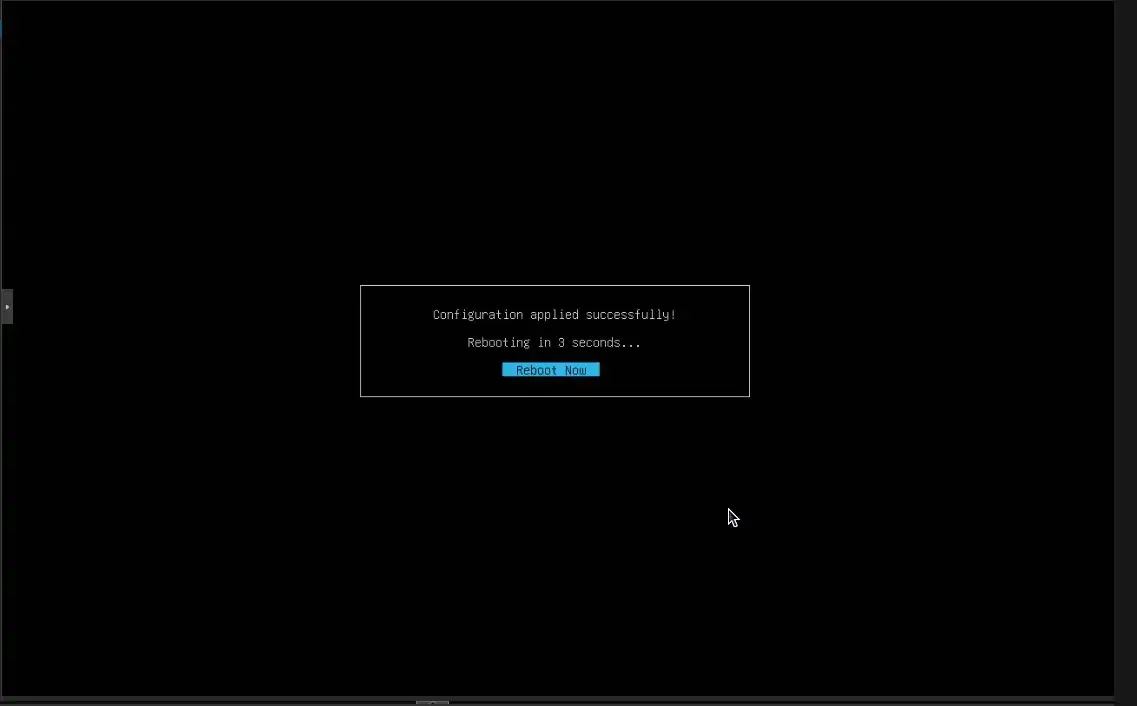
- The automatic EVE-NG Setup Wizard triggers immediately upon login:
-
Type root password: Enter a secure new root password (e.g.,
Cisco123!) or keepeve. -
Type hostname:
eve-ng -
Type DNS domain name:
lab.local -
IP Configuration: Select Static IP using the arrow keys and spacebar.
-
Management IP Address:
192.168.1.50 -
Subnet Mask:
255.255.255.0 -
Default Gateway:
192.168.1.1 -
Primary DNS Server:
1.1.1.1 -
Secondary DNS Server:
8.8.8.8 -
NTP Server:
pool.ntp.org -
Connection Type:
Direct Connection(select unless behind an HTTP corporate proxy).

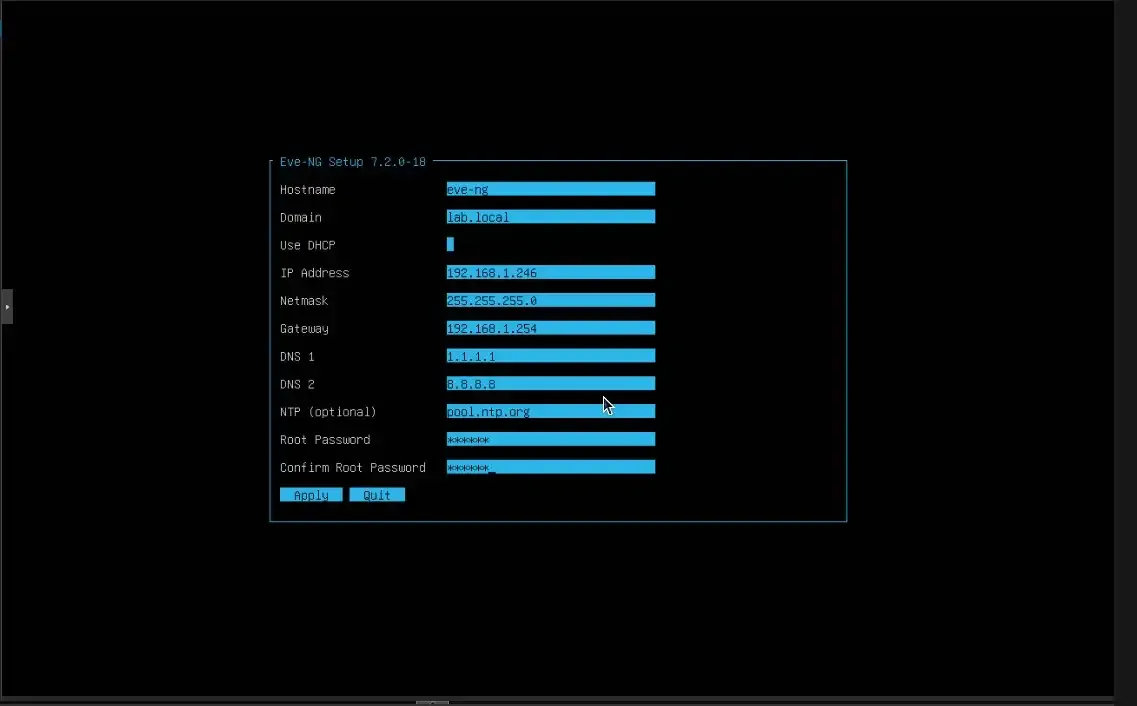
- Press Enter. The VM reboots automatically to apply network changes.
Step 7: Access the Web UI & Perform Post-Install Hardening
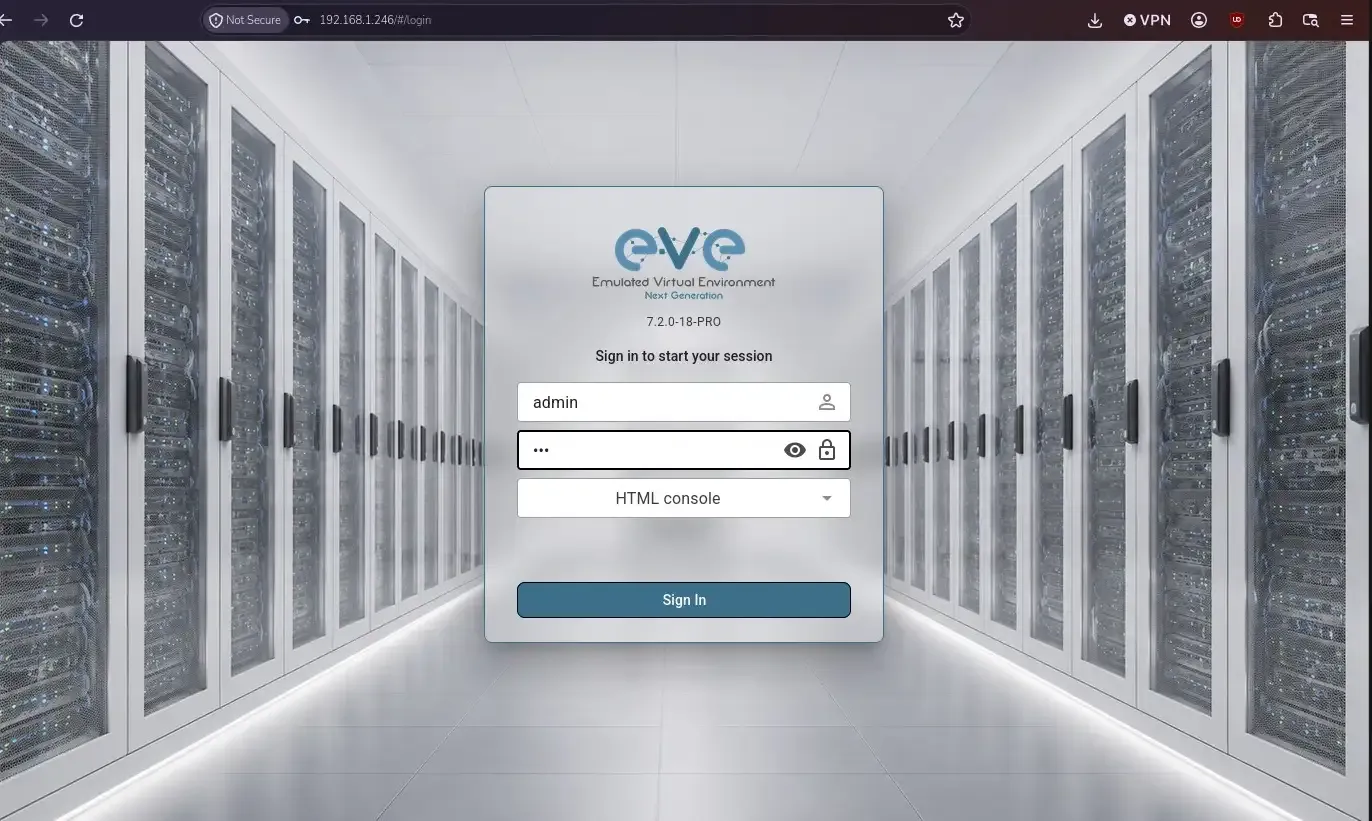
- Open a browser on any machine on your LAN and navigate to
http://192.168.1.50. - Log in using default web interface credentials:
- Username:
admin - Password:
eve - Console Type: Select Native Console (uses local SSH/Telnet handlers like PuTTY or SecureCRT).
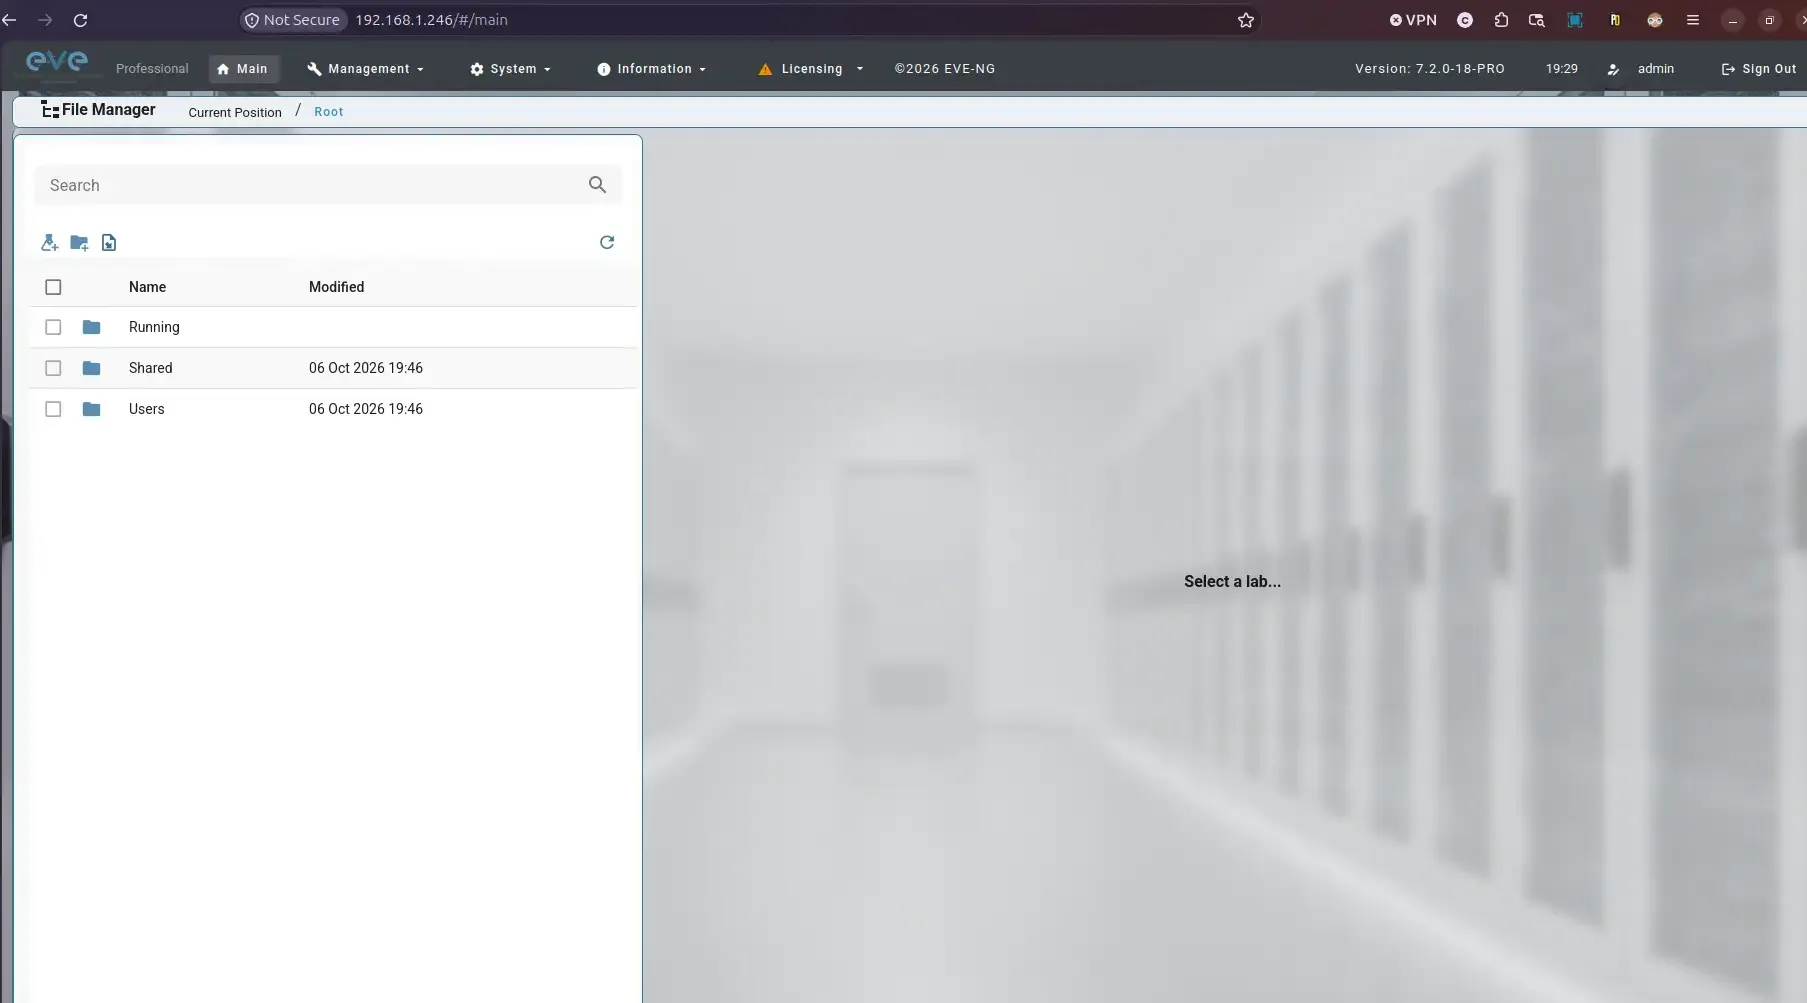
Figure 5: EVE-NG HTML5 Web Management interface login page.
- SSH into the EVE-NG VM to upgrade base system packages and verify nested KVM status inside the guest:
ssh root@192.168.1.50
apt-get update && apt-get dist-upgrade -y
kvm-ok- Expected Result:
kvm-okoutputs:INFO: /dev/kvm existsandKVM acceleration can be used. - Verification Command:
root@eve-ng:~# kvm-ok
INFO: /dev/kvm exists
KVM acceleration can be used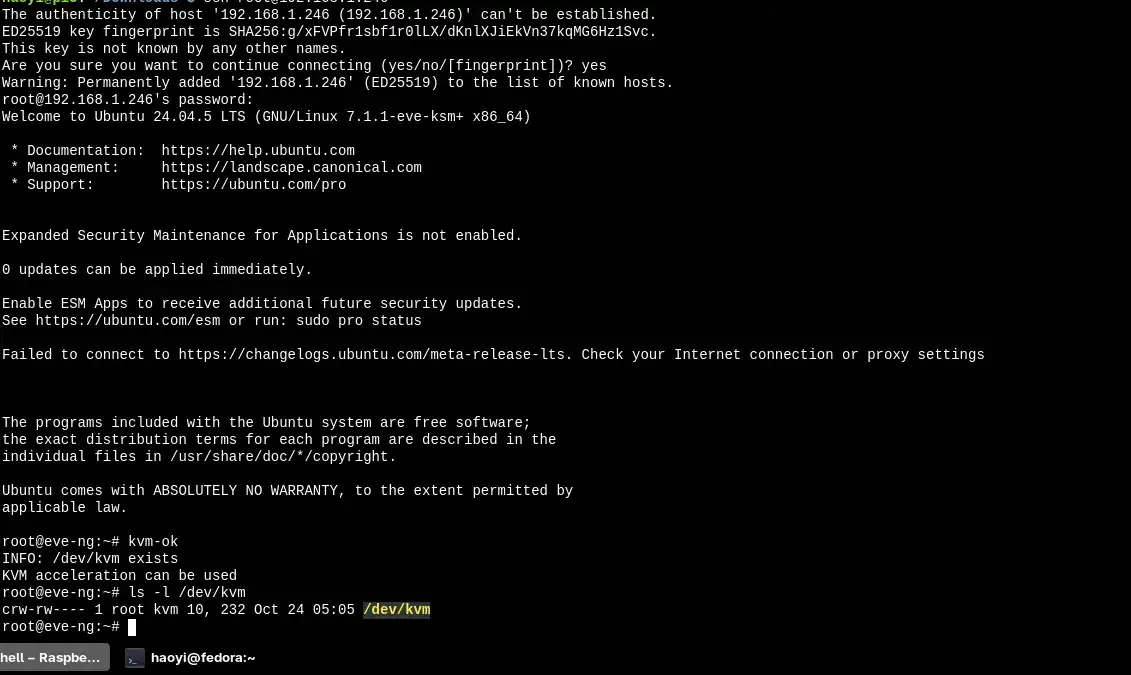
- Create a Clean Proxmox VM Snapshot: Before copying network images or making major system modifications, capture a baseline snapshot on Proxmox:
qm snapshot 105 Clean_Base_Install --description "EVE-NG BASE 7.2 installed, network configured, KVM acceleration verified"- Verification Command:
qm listsnapshot 105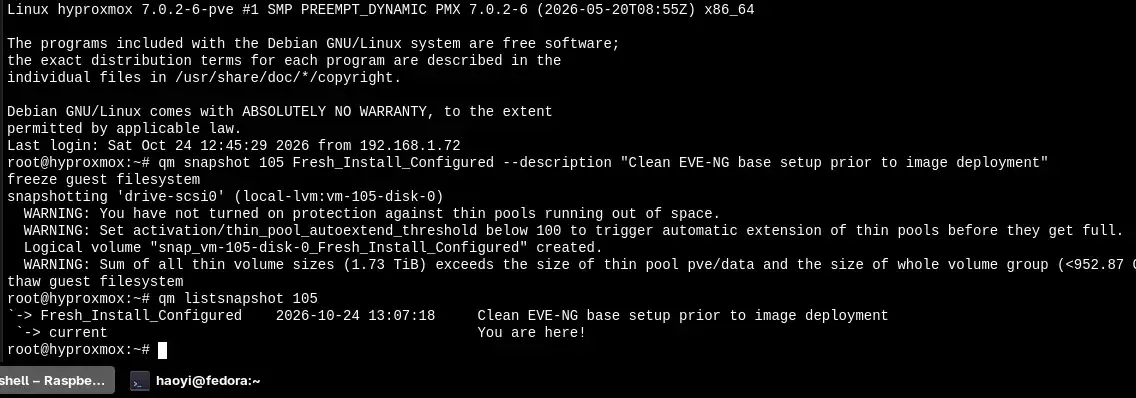
- Login to EVE-NG: You’re done! Now we can login to the EVE-NG console by visiting the VM IP in any browser in the same network.
Troubleshooting & Pitfalls Matrix
The following matrix documents the specific issues encountered during this installation alongside common deployment failure modes.
| Error / Symptom | Root Cause | Remediation & Fix |
|---|---|---|
-bash: ide2: command not found when running qm create |
Unquoted semicolon in --boot order=scsi0;ide2 caused Bash to interpret ide2 as a separate shell command. |
Wrap the boot parameter in quotes: --boot "order=scsi0;ide2". |
WARNING: Sum of all thin volume sizes... exceeds size of thin pool |
Virtual disk allocation exceeds physical LVM-Thin capacity (thin pool overcommit). | Normal for thin provisioning. Monitor usage with lvs, set thin_pool_autoextend_threshold = 80 in /etc/lvm/lvm.conf, and enable fstrim.timer in guest VMs. |
Broken repos / package errors on apt-get upgrade |
Installed legacy EVE-NG Community Edition v6.2.0-4 (EOS/EOL). | Download and deploy EVE-NG BASE/RBL Version 7.2.0-18 (Full ISO) instead. |
| Node starts in EVE-NG but stays blue (stopped state) | Missing host CPU flags or missing EVE-NG file permission wrapper execution. | Ensure Proxmox VM CPU is set to host (qm set 105 --cpu host). Run /opt/unetlab/wrappers/unl_wrapper -a fixpermissions inside EVE-NG after adding images. |
KVM acceleration can be used: FAIL inside EVE-NG VM |
AMD-V / Intel VT-x nested virtualization disabled on Proxmox host. | Verify cat /sys/module/kvm_amd/parameters/nested returns 1. Add options kvm_amd nested=1 to /etc/modprobe.d/kvm-amd.conf. |
| Clicking node in web UI opens nothing or throws browser error | Missing local protocol scheme handlers (telnet://, capture://) on client PC. |
Install EVE-NG-Client-Pack.exe (Windows) or configure eve-ng-integration wrapper scripts (macOS/Linux). |
Key Takeaways & Lessons Learned
- Memory Sizing Trumps CPU: Network emulators run heavy software images. On a host with 32 GB RAM running adjacent VMs (LLMs, RHEL, Kali), assigning 22 GB to EVE-NG leaves a comfortable 10 GB buffer for system processes without inducing RAM swap thrashing.
- Thin Provisioning Discipline: Sparse disk allocation (
qcow2or LVM-Thin) makes large labs feasible on single SSDs, but monitoring actual physical disk usage vialvsand running periodicfstrimis required to prevent pool exhaustion freezes. - Always Use
cpu: host: Virtual networking nodes rely on nested hardware-assisted virtualization. Skipping CPU passthrough severely degrades performance or prevents modern virtual switches from booting altogether.
Next Steps
With EVE-NG fully provisioned, hardened, and accessible over the LAN, the next post in this series will cover:
- Formatting vendor images (Cisco CML/vIOS, Cat8000v, and Juniper vJunos).
- Mastering EVE-NG directory structures (
/opt/unetlab/addons/qemu/) and image naming conventions. - Executing the permission wrapper script (
unl_wrapper -a fixpermissions). - Building a cross-vendor topology featuring Cisco IOSv routers, IOSvL2 switches, and Juniper vJunos appliances with OSPF routing across vendor boundaries.